Trying to prepare a 72 Hour Kit Food List? Here’s a 3 day Menu and Shopping List to easily prepare your family for an emergency!
With all the natural disasters occurring right now, I am so grateful for all the hours I put into getting our family prepared. It has been interesting to talk openly with our kids about what we would do in the event of an emergency, While we are not bracing for a hurricane by any mens, we are not immune to natural disasters of other sorts. Fire and earthquake preparedness are the main concerns for our family.
72 Hour Kit Prep
(this post contains affiliate links)
My biggest focus in our emergency preparedness is most definitely food. With a growing family, you can imagine the different variations of “what is there to eat” that I get throughout the day.
A little side note here: My mom must have hated getting asked about food all the time when I was growing up too. Although I loathed it, and vowed I would never treat my kids so terribly, I have taken on her EXACT dialogue.
Child: What’s for dinner (breakfast, lunch, dinner, snack, dessert)
Mom: Food
Child: What kind of food?
Mom: The kind you eat.
Oh the torture! I have to carry on the legacy somehow though, right?
In the event of an emergency situation, the last thing I want to have to think about is what’s for dinner. It’s stressful enough on a perfect day! I talked exactly what’s in our Kids 72 Hour Kit and Adult 72 Hour Kits, but today I just want to focus on the food portion.
72 Hour Kit Food Criteria
-light weight
-has a fairly long shelf life
-grab and go-little to no preparation
-has enough calories
-would actually be eaten and enjoyed
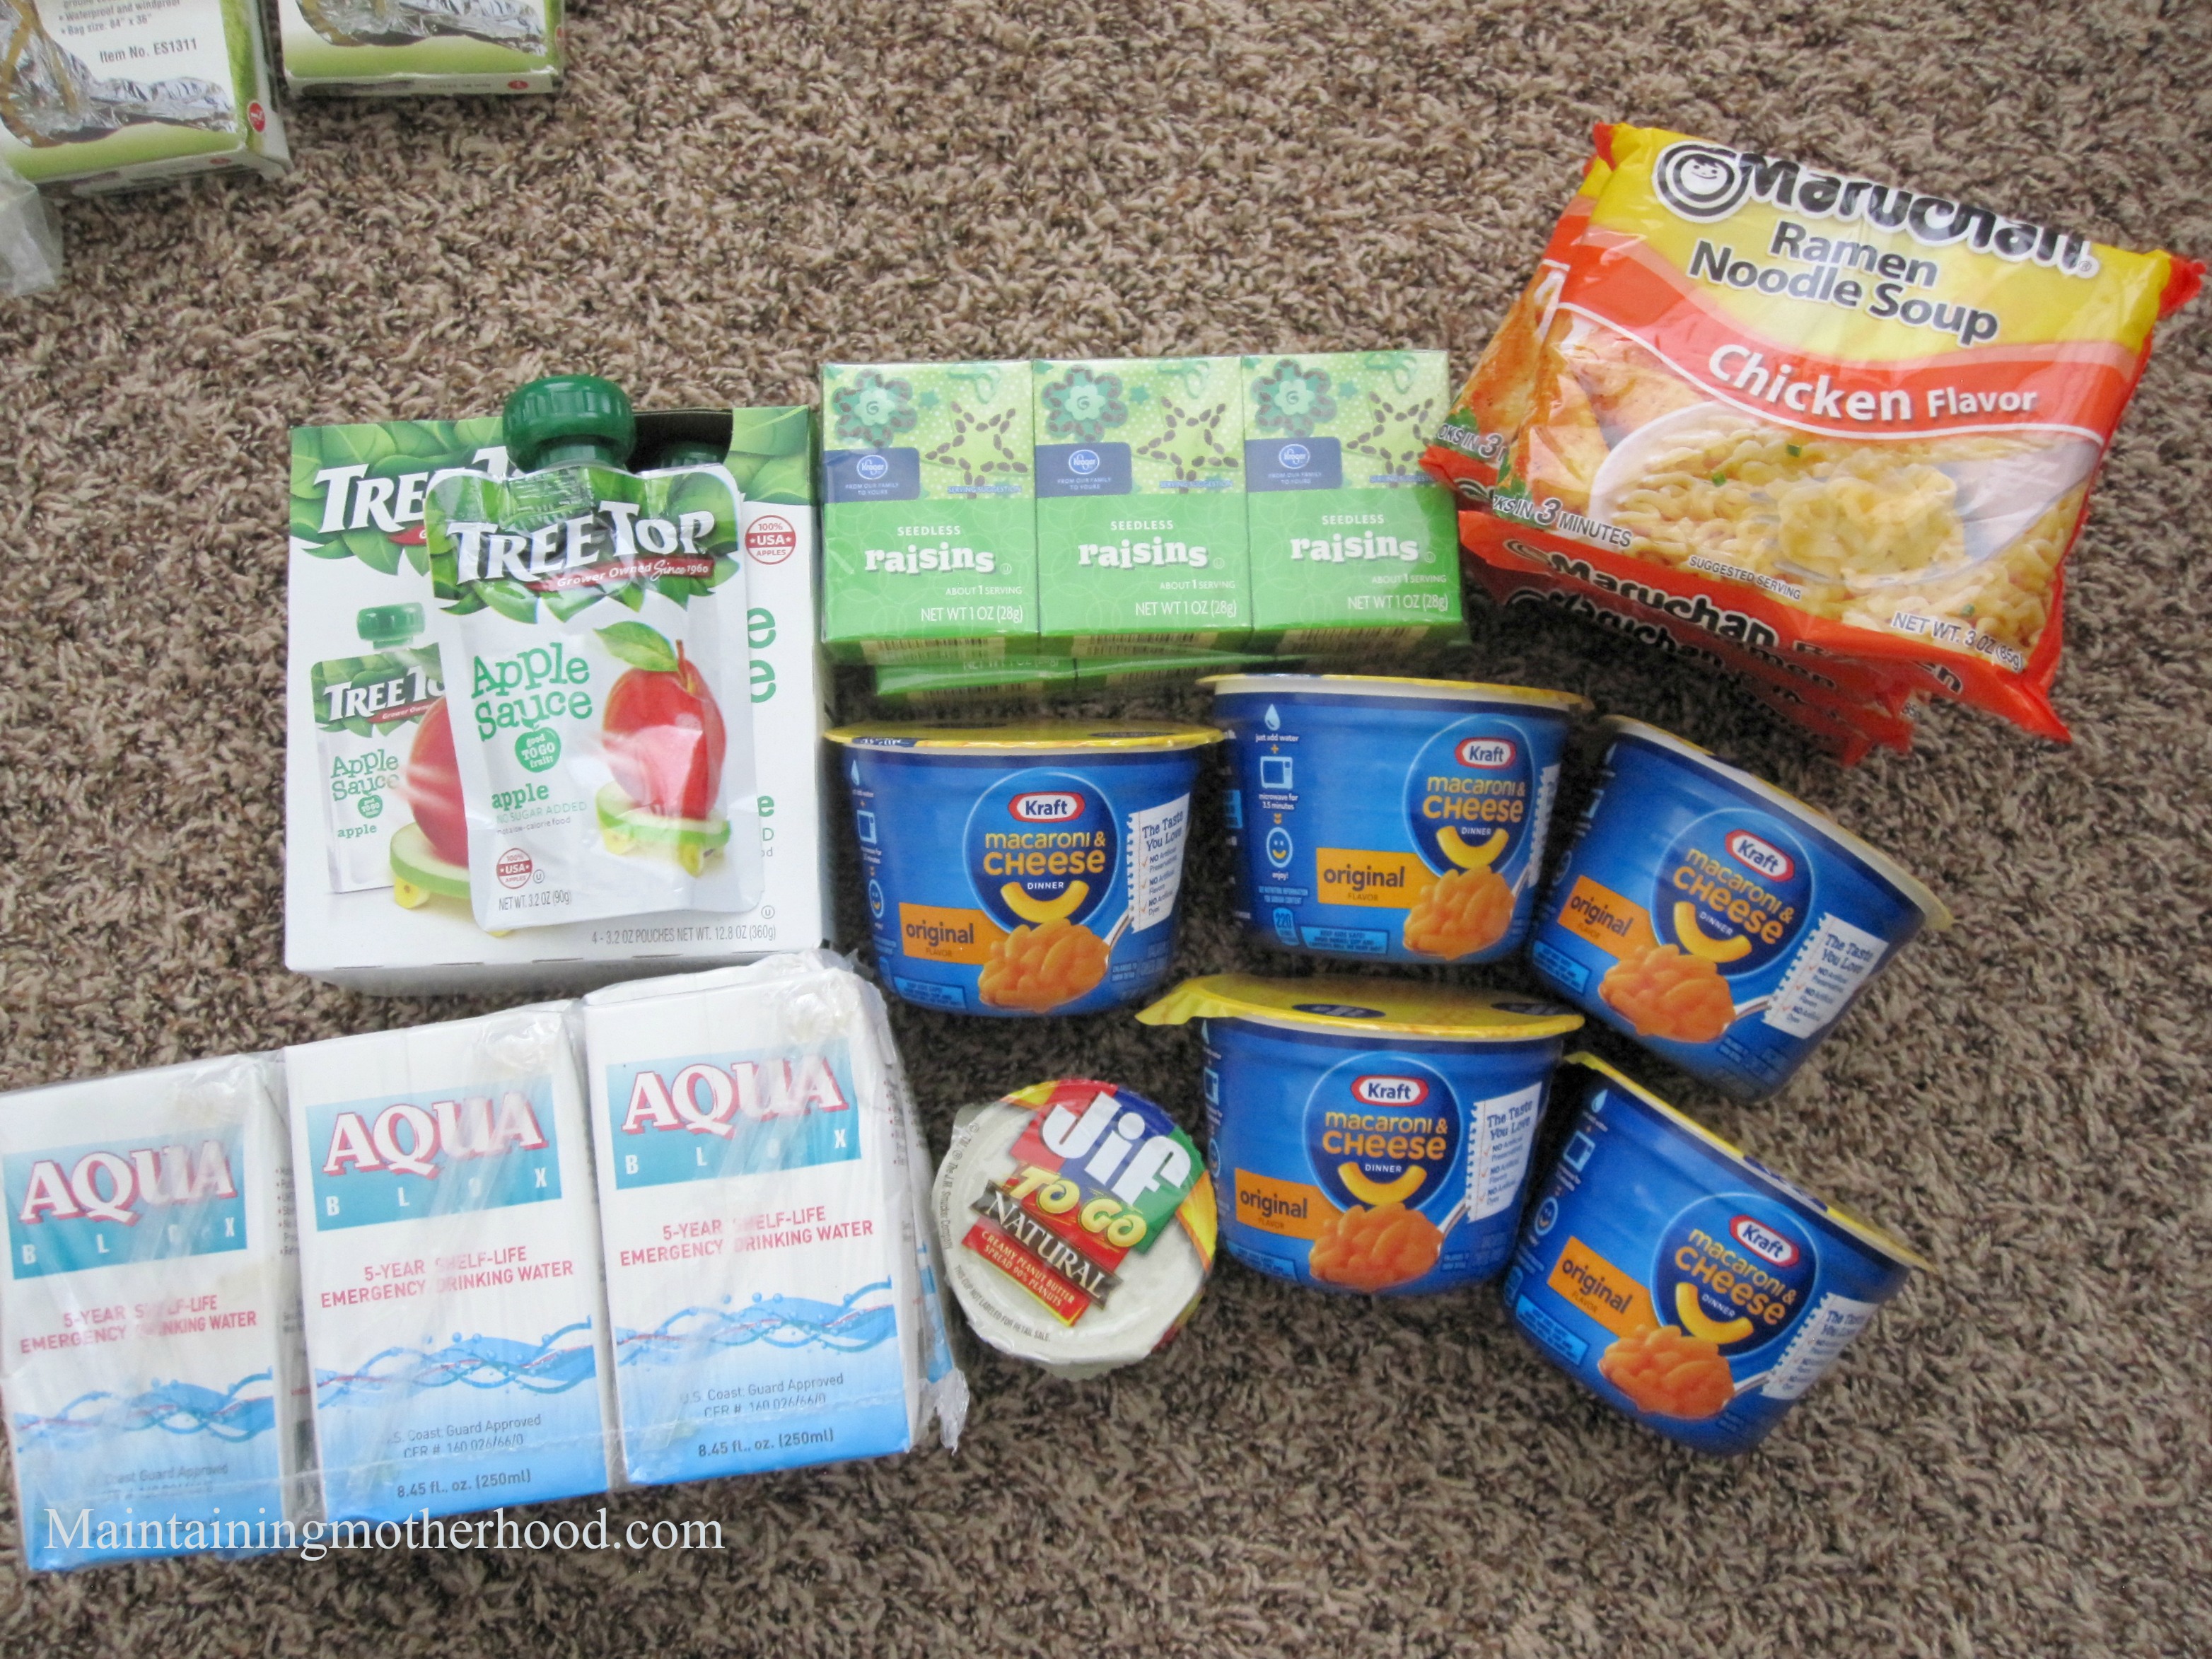
This last part is still somewhat up in the air. We don’t eat many processed foods, and it is pretty hard to find whole foods that have a long shelf life without packing #10 cans in each person’s backpack. I tried to keep things as healthy as possible. My kids were getting excited over most of the things I was putting in the cart, so that is a good sign. Some of the foods they have never tried before, but the shelf life and calorie count won me over. I plan to rotate these foods out and use them as fun foods in the kids’ lunches during the school year since they are all grab-and-go types of foods.
The other part that makes this simple is most of this food doesn’t need to be cooked. Even the pasta can be dumped in the Ziploc bag it is stored in, soaked throughout the day, and eaten cold. If you do wish to cook your food, we have Fuel Cell Stoves in the adult and older kid 72 hour kits to heat the food up.
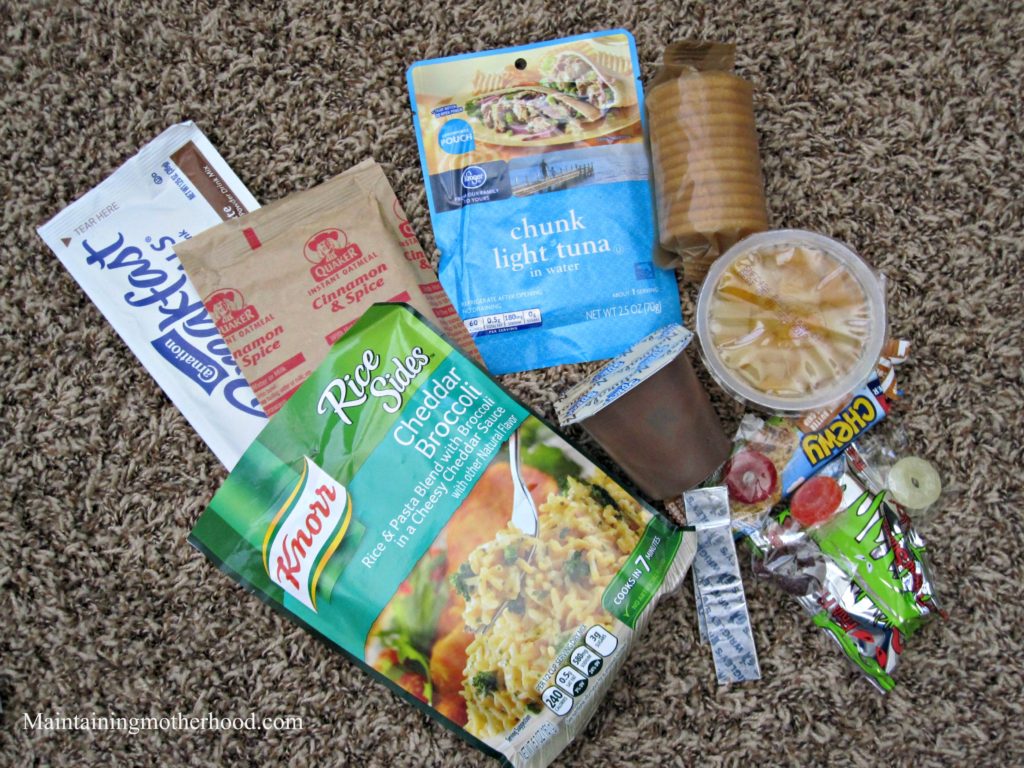
Day 1
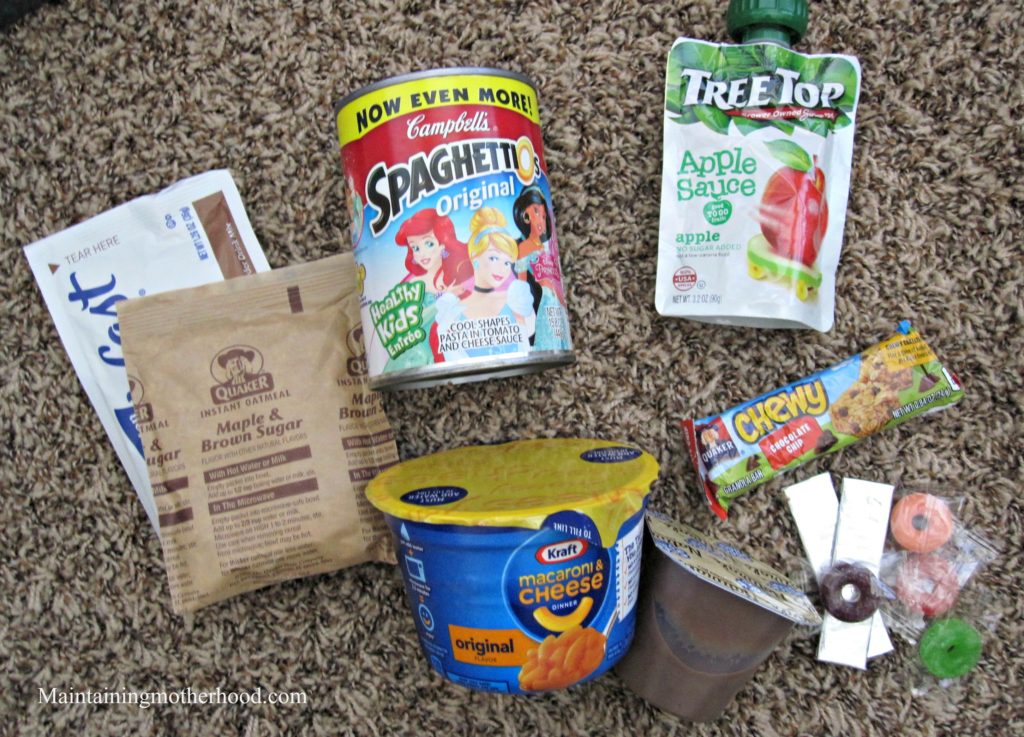
Day 2
Day 3
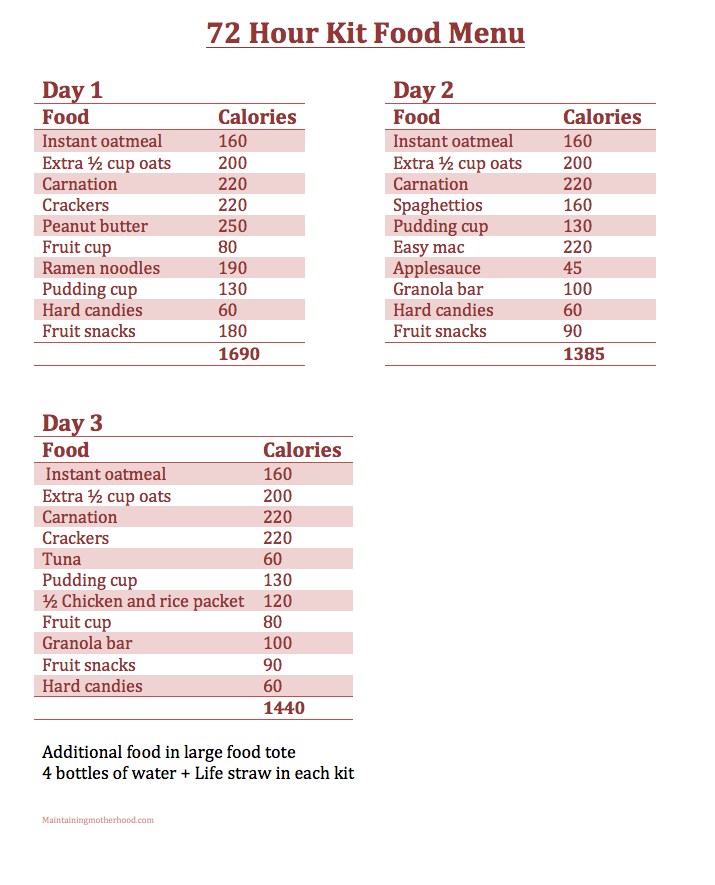
I split up the food into bags labeled Day 1, Day 2, Day 3 and included a menu. Super user friendly. For the oatmeal, I included a baggie with regular oats to add to the instant oatmeal. This gives it more substance and calories. I figure you can also then use the bag to soak the oats in overnight. With the food being split up into the different gallon size bags, you can also reuse that bag for making the Ramen noodles and the chicken and rice dinner.
I have the same foods and amounts of food in each bag. Some people will eat more than others, but then the food is distributed evenly. Each adult backpack also contains 4 bottles of water.
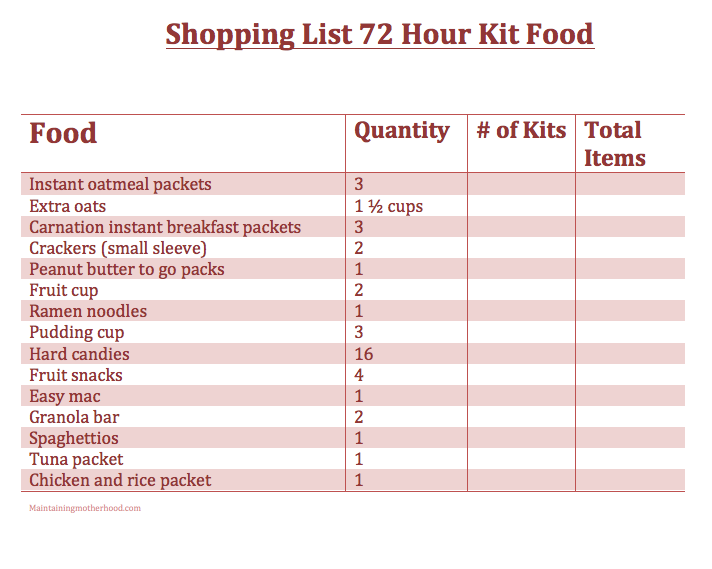
72 Hour Kit Food Shopping List and Calorie Count
Get the Adult 72 Hour Kit Shopping List here!
Calories
Knowing that my calorie count was higher than just the minimum needed for survival was important to me. (Get your menu with calorie count printable here!) The count isn’t super high, but I figure right around 1500 calories is a pretty good amount in a backpack. We have a whole other tote filled with more food beyond what is listed in the 72 hour kits.
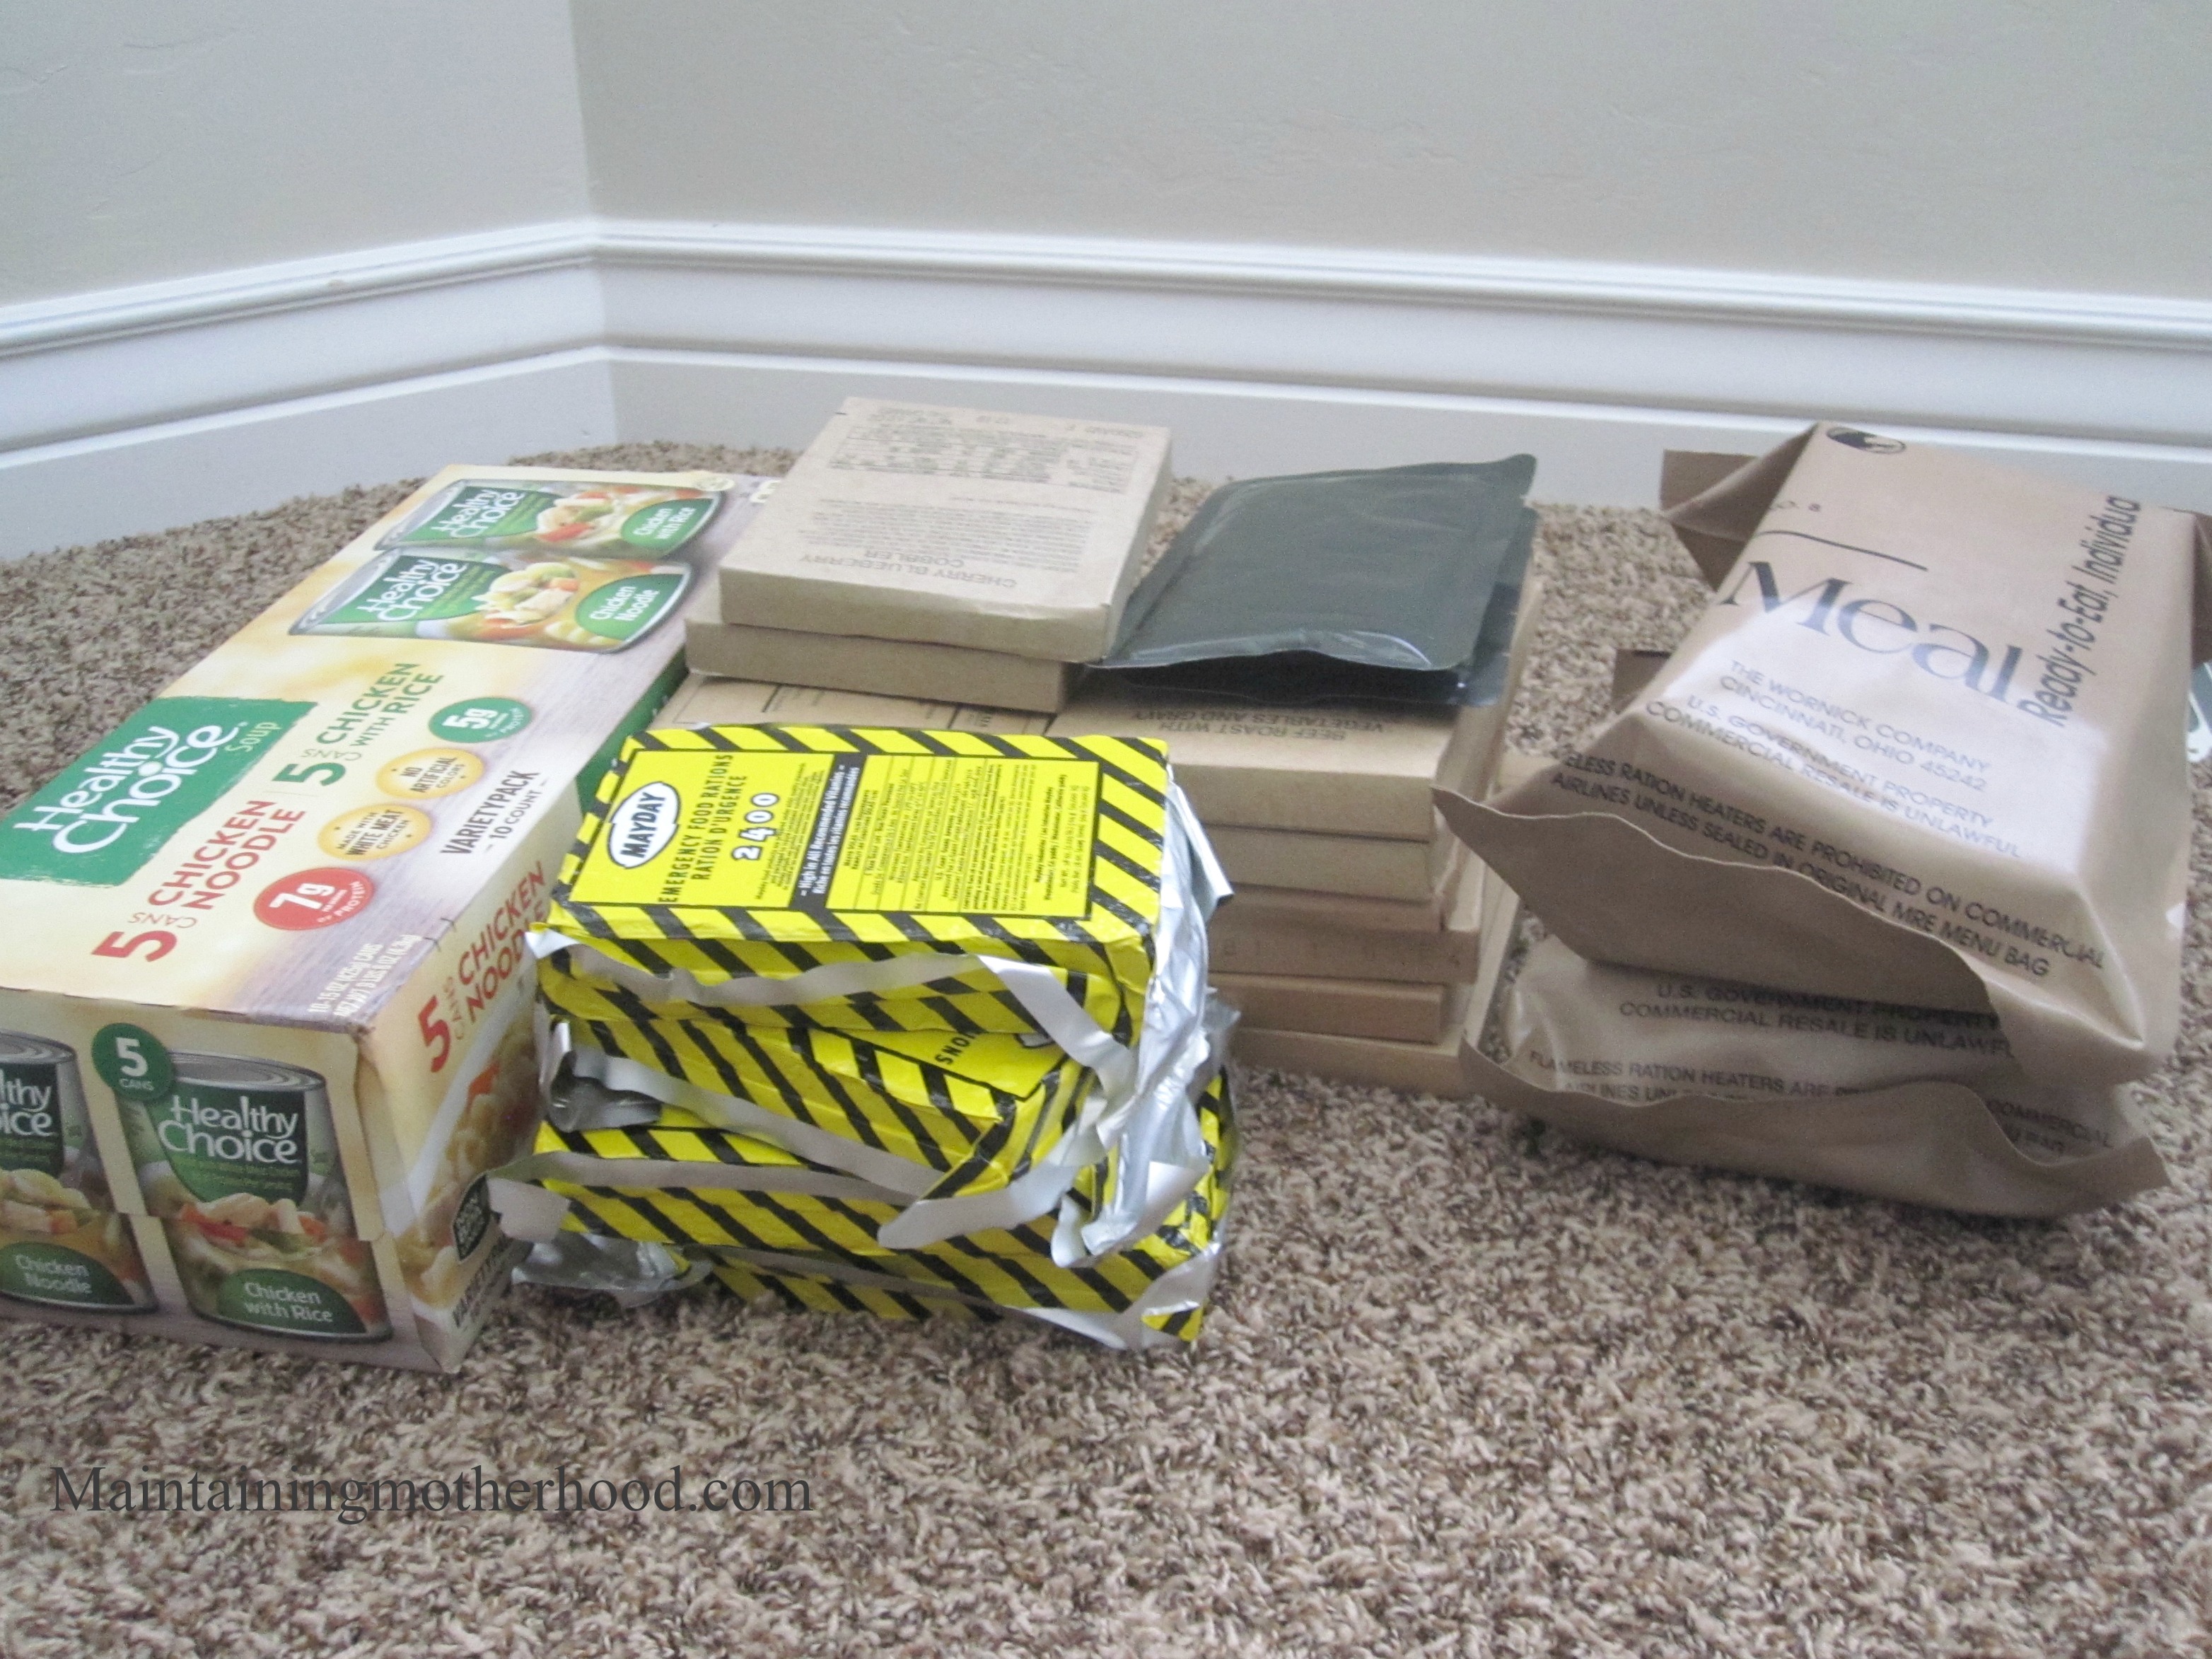
This extra tote stored right near all of our 72 hour kits. In it, we have some extra food that would have been too heavy or bulky for the kids to carry. There are MREs, Nutrition bars, cans of soup, boxes of water, and extras of the food that we bought for the individual kits.
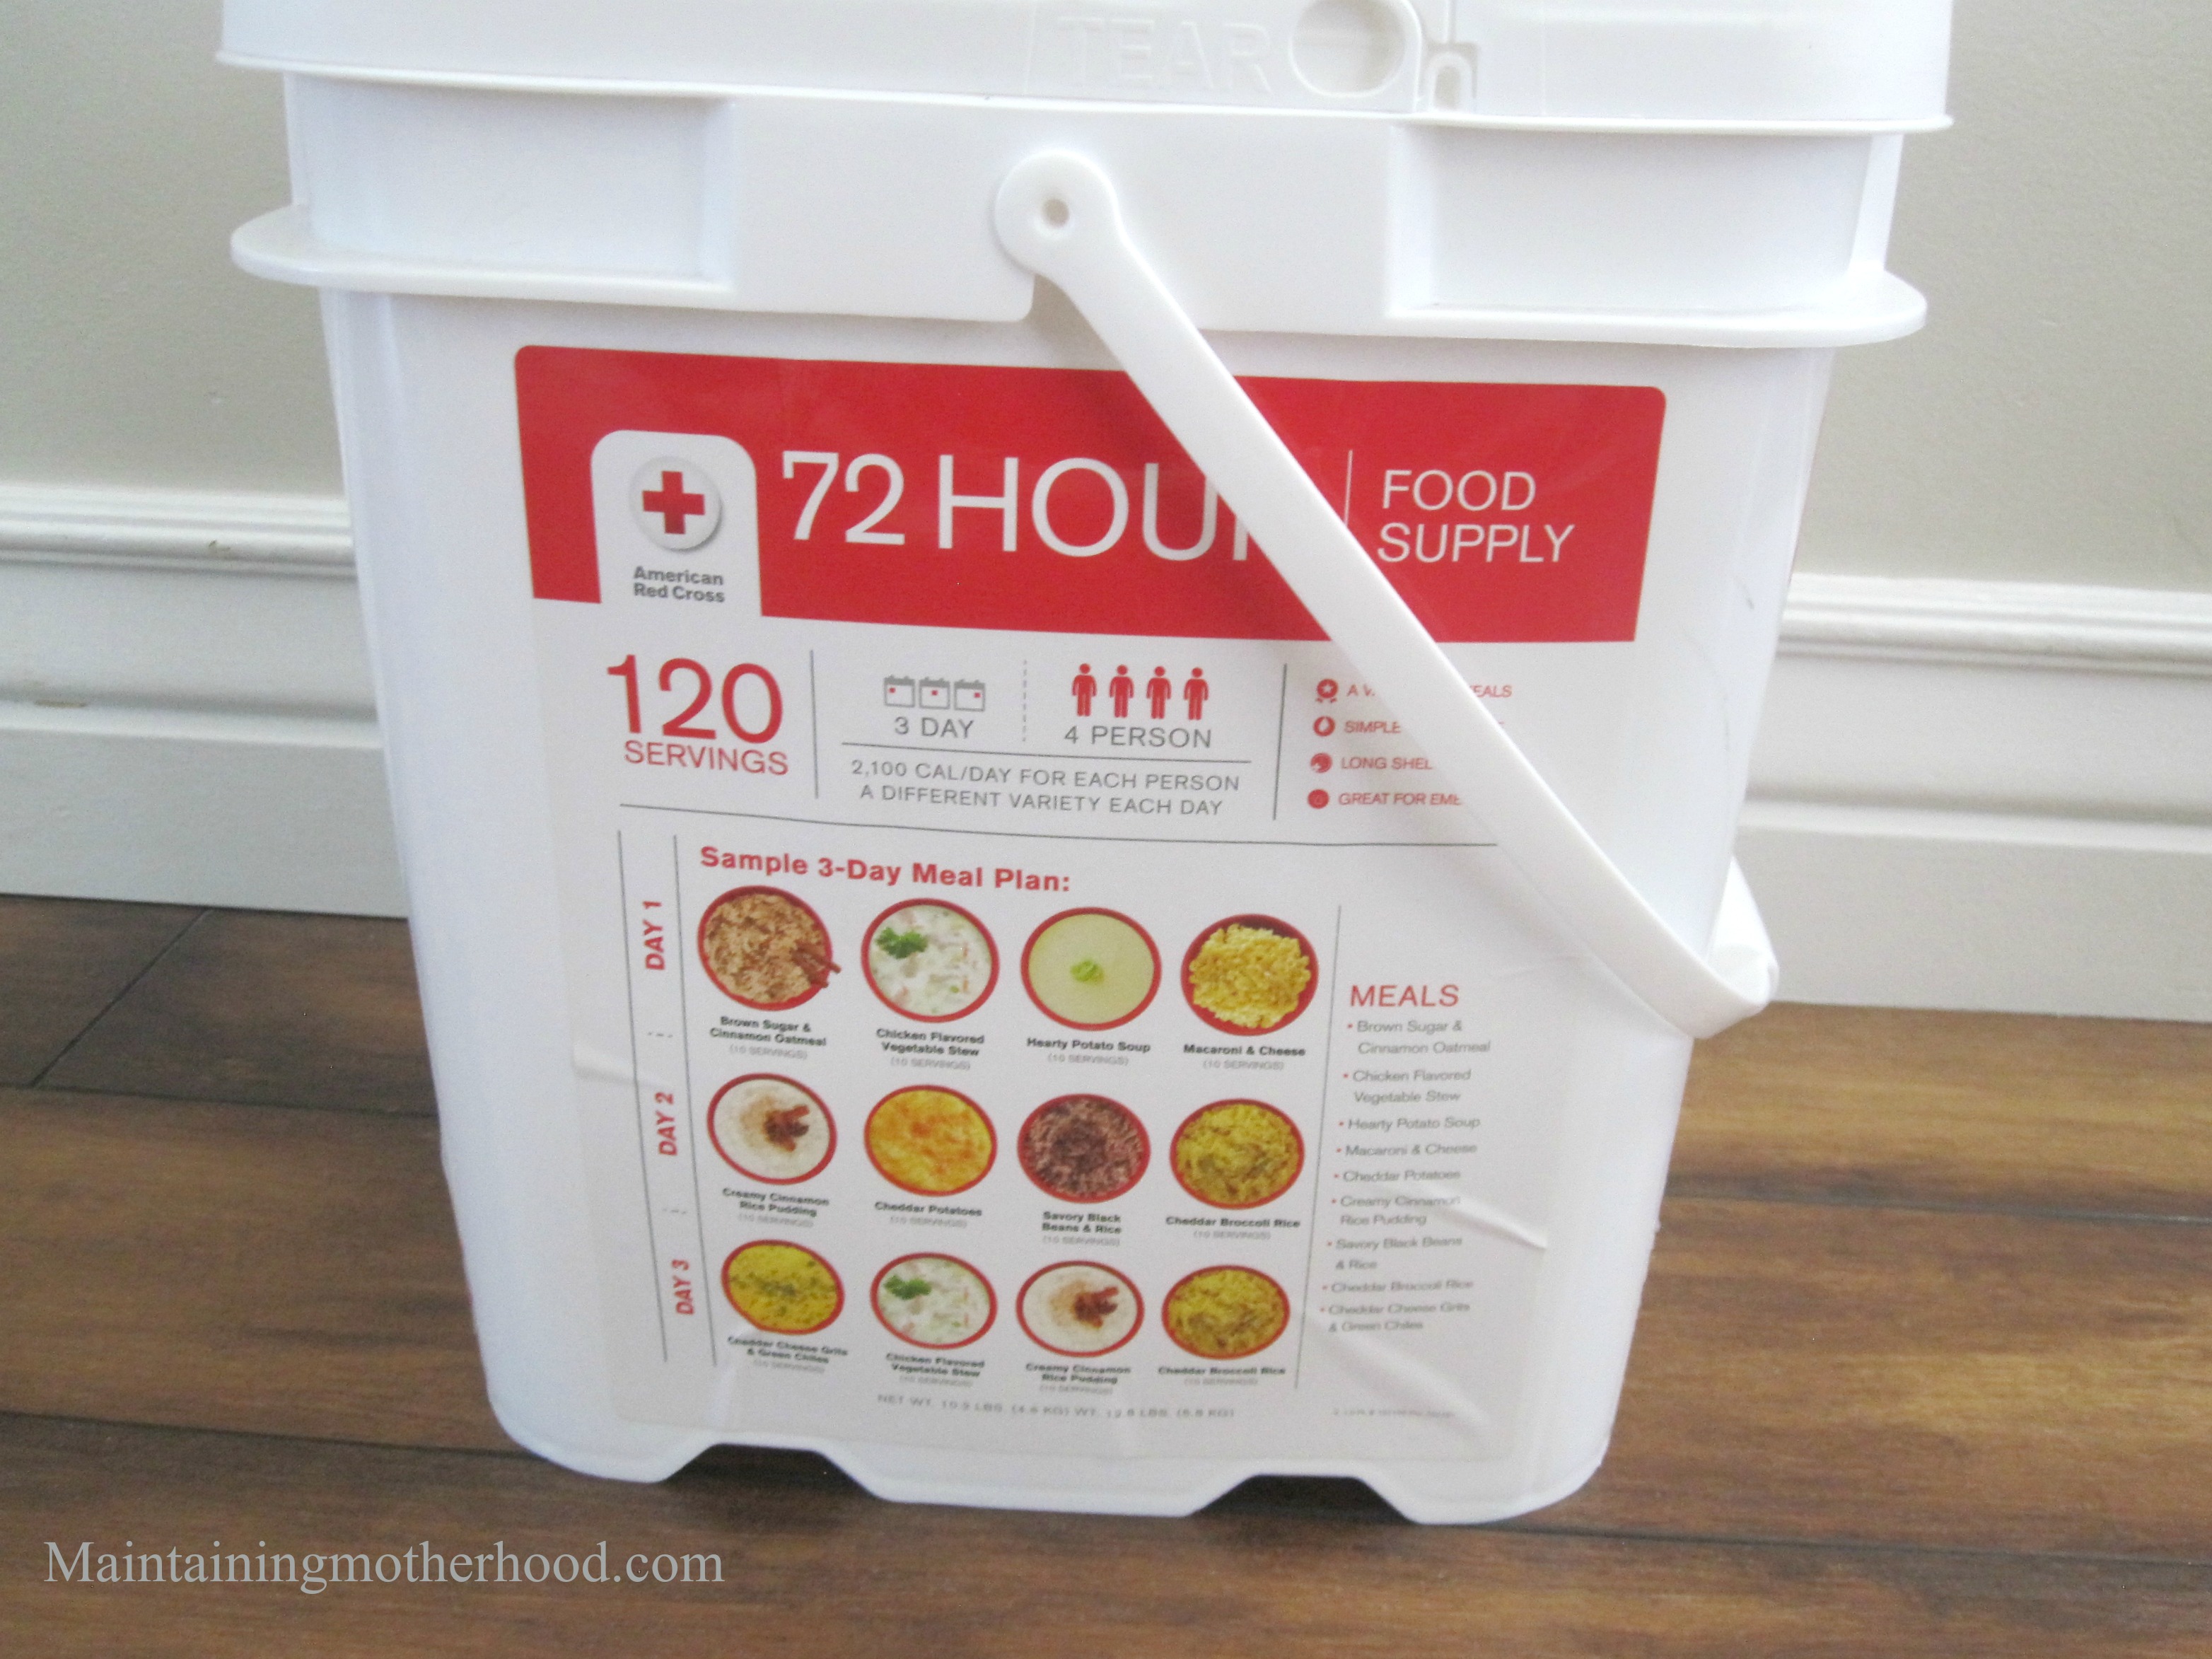
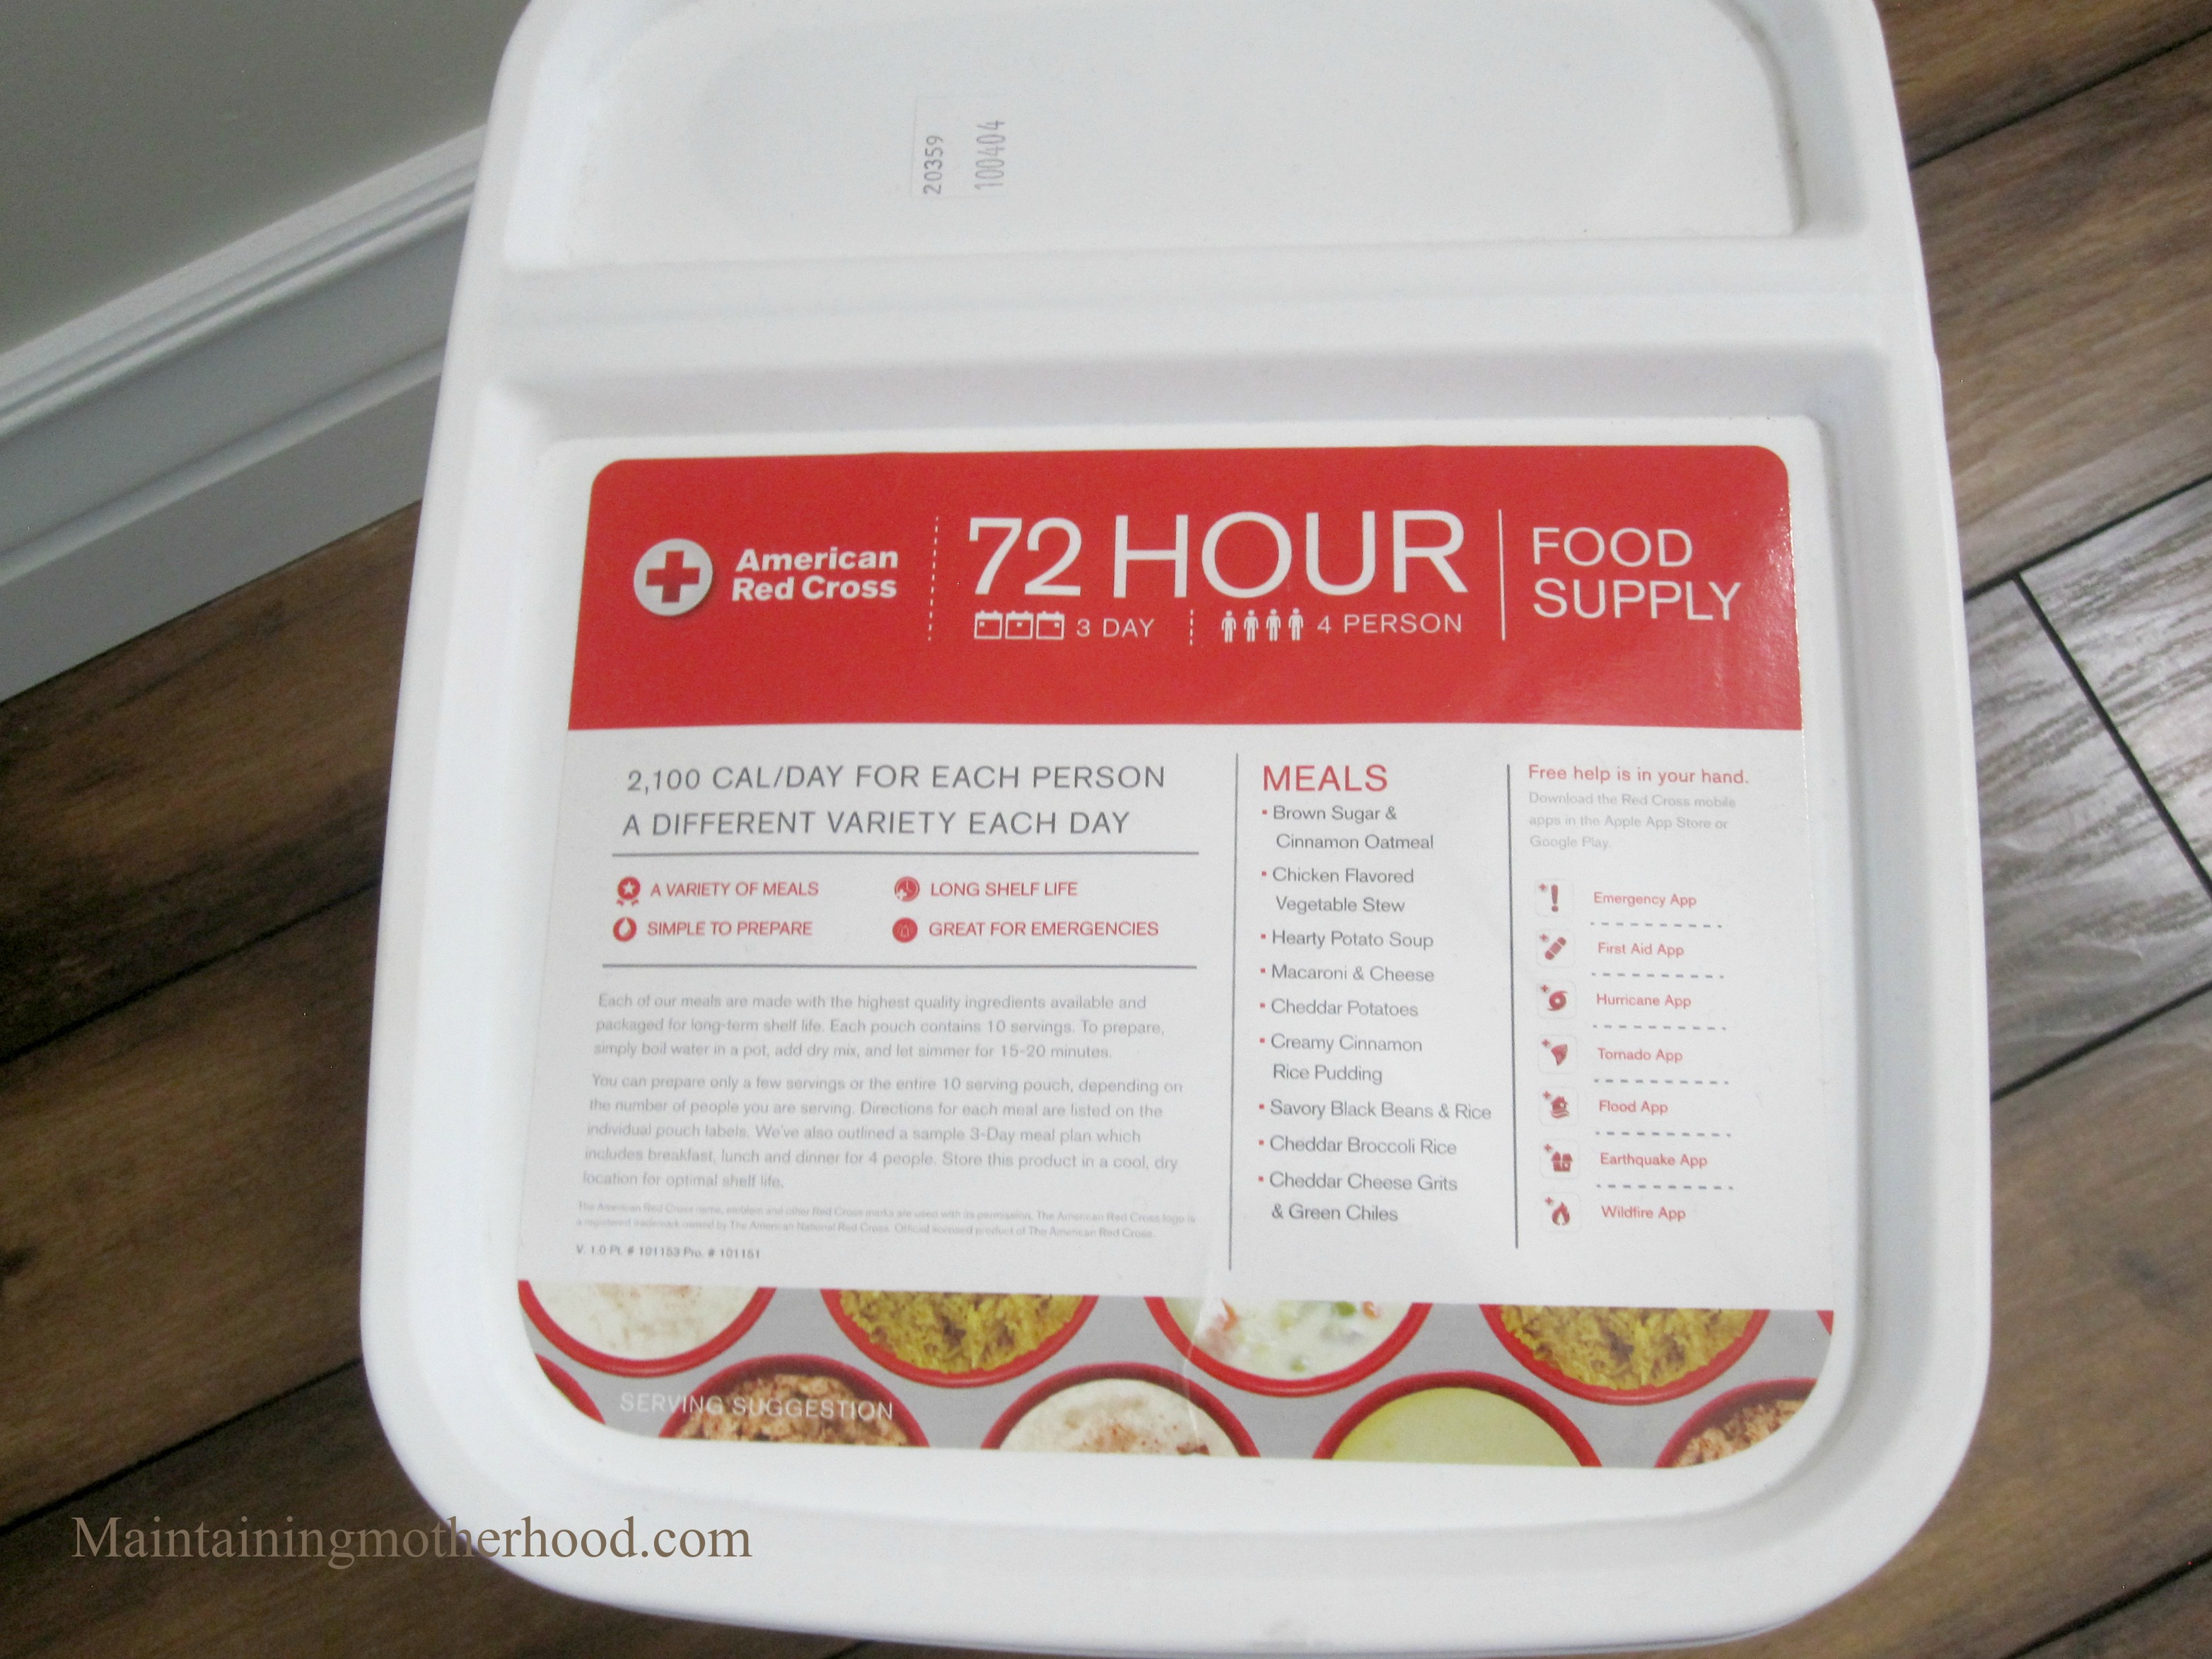
We also found these Red Cross 72 Hour Kit Food Supply Buckets at Costco (they were sold out online, so here’s a similar option). This was appealing because all you have to do to prepare these meals is add water. The bucket is fairly lightweight and is an easy size to grab and put in the car in case of an evacuation. We have these buckets stored next to our 5 gallon water storage, since the two go hand-in-hand.
Difficult, Medium, Easy
With all this info, the bottom line is, there are 3 ways to go about getting emergency food for your family.
Difficult
The most time-intensive way to stock up on Emergency food would be to follow a menu similar to the one I made. Benefits to this, are:
-custom make the food to be what you will eat and enjoy
-plan for any allergies
-easy to rotate by incorporating into food you regularly eat
Medium
By buying an Emergency Food supply kit like any of these, you have more substantial meals, but you will need to put together your own 72 Hour Kit Emergency Supplies.


If you wanted to go this route, you could purchase a food kit like the ones above, and then a preparedness kit like this:


Easy
If you want to go the easiest route of all, you can buy a comprehensive kit. I personally haven’t tried these “ration bars”, but I don’t know that I would particularly enjoy only eating a food bar for 3 days.


Just remember that whatever route you do decide to take, you will need to check expiration dates and make sure that the food and other supplies are rotated when necessary so that your kit is ready for use at all times!




Hey, can I list your menu and list. I tired clicking the link but it said denied access.
I fixed the problem. You should be able to access it now!