Do you have 72 Hour Kits? Follow the simple checklist and menu plan to put together everything you need for your Adult 72 Hour Kit today!
Are your 72 hour kits ready? I have spent weeks reading everything I can get my hands on to try to make the best Adult 72 hour kits for our family. Hopefully we never have to use these, but I’m glad we have them all done now. I was joking with my husband the other night that if there is ever an emergency, we better grab those first since I spent so stinking much time researching them!
(This post contains affiliate links)
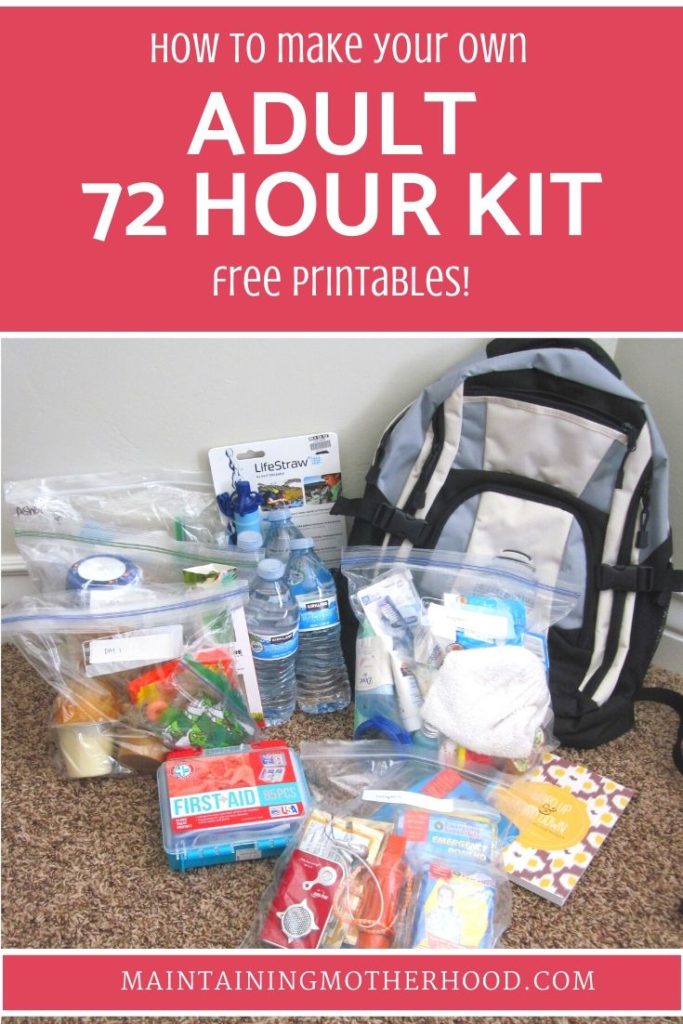
Adult 72 Hour Kit
Now that I have done all the grunt work for you, this should be a super easy project where you simply print the list and put together your supplies!
We were lucky to already have quite a few supplies for our 72 hour kits. I had half-heartedly thrown some together, but that was back when our 4th kid was just a baby. We really needed to update things to suit our current needs. I figured if I was going to put in the time, I was going to do it right. Since April and October are the months that we focus on Emergency Preparedness, we went all out this time. Let me break it down for you:
(Looking for more ideas just on food? Check out my 72 Hour Kit Food List.)
My Criteria
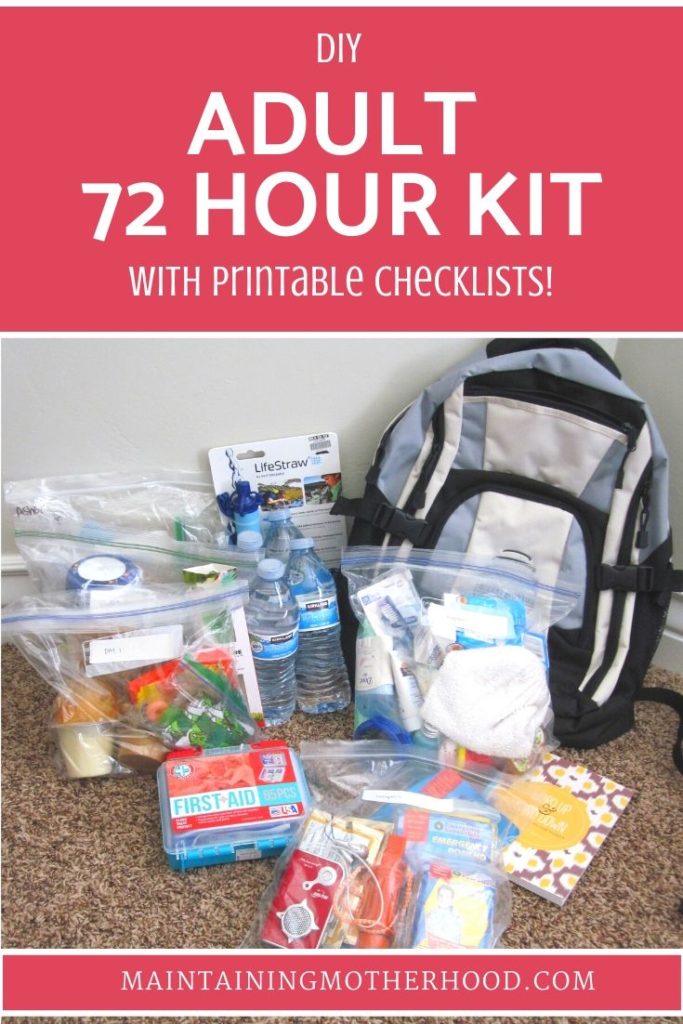
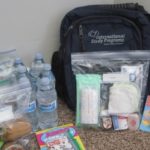
For our 72 hour kits, I wanted to have things in the backpacks that were practical, easy to use, and easy to access. We have 2 emergency totes in addition to the backpacks. One tote has extra emergency supplies and the other has extra food. I am hoping that we would be able to grab all the extra totes in the event of an emergency. If we have to leave on foot we have the necessities in our bags, but they aren’t so heavy that we can’t manage them. Knowing that some kids won’t be able to carry their own packs, and some kids would most likely have to be carried made this extra important.
Within the backpacks, each category of supplies is separated by a Gallon Ziploc bag. This will make it easy to find things when we do have to use our kits, and also will make rotating things MUCH easier. Get your Adult 72 Hour Kit Checklist here!
Emergency Supplies
I have an amazing Aunt who has given us TONS of emergency supplies over the years. Every Christmas, I look forward to seeing what new things we will receive. One year we got a portable toilet! With little kids, I can’t even tell you how awesome that will be to have an actual toilet seat to use!
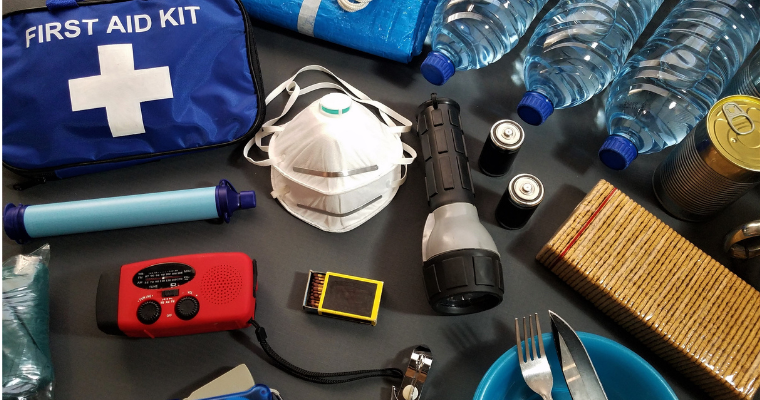
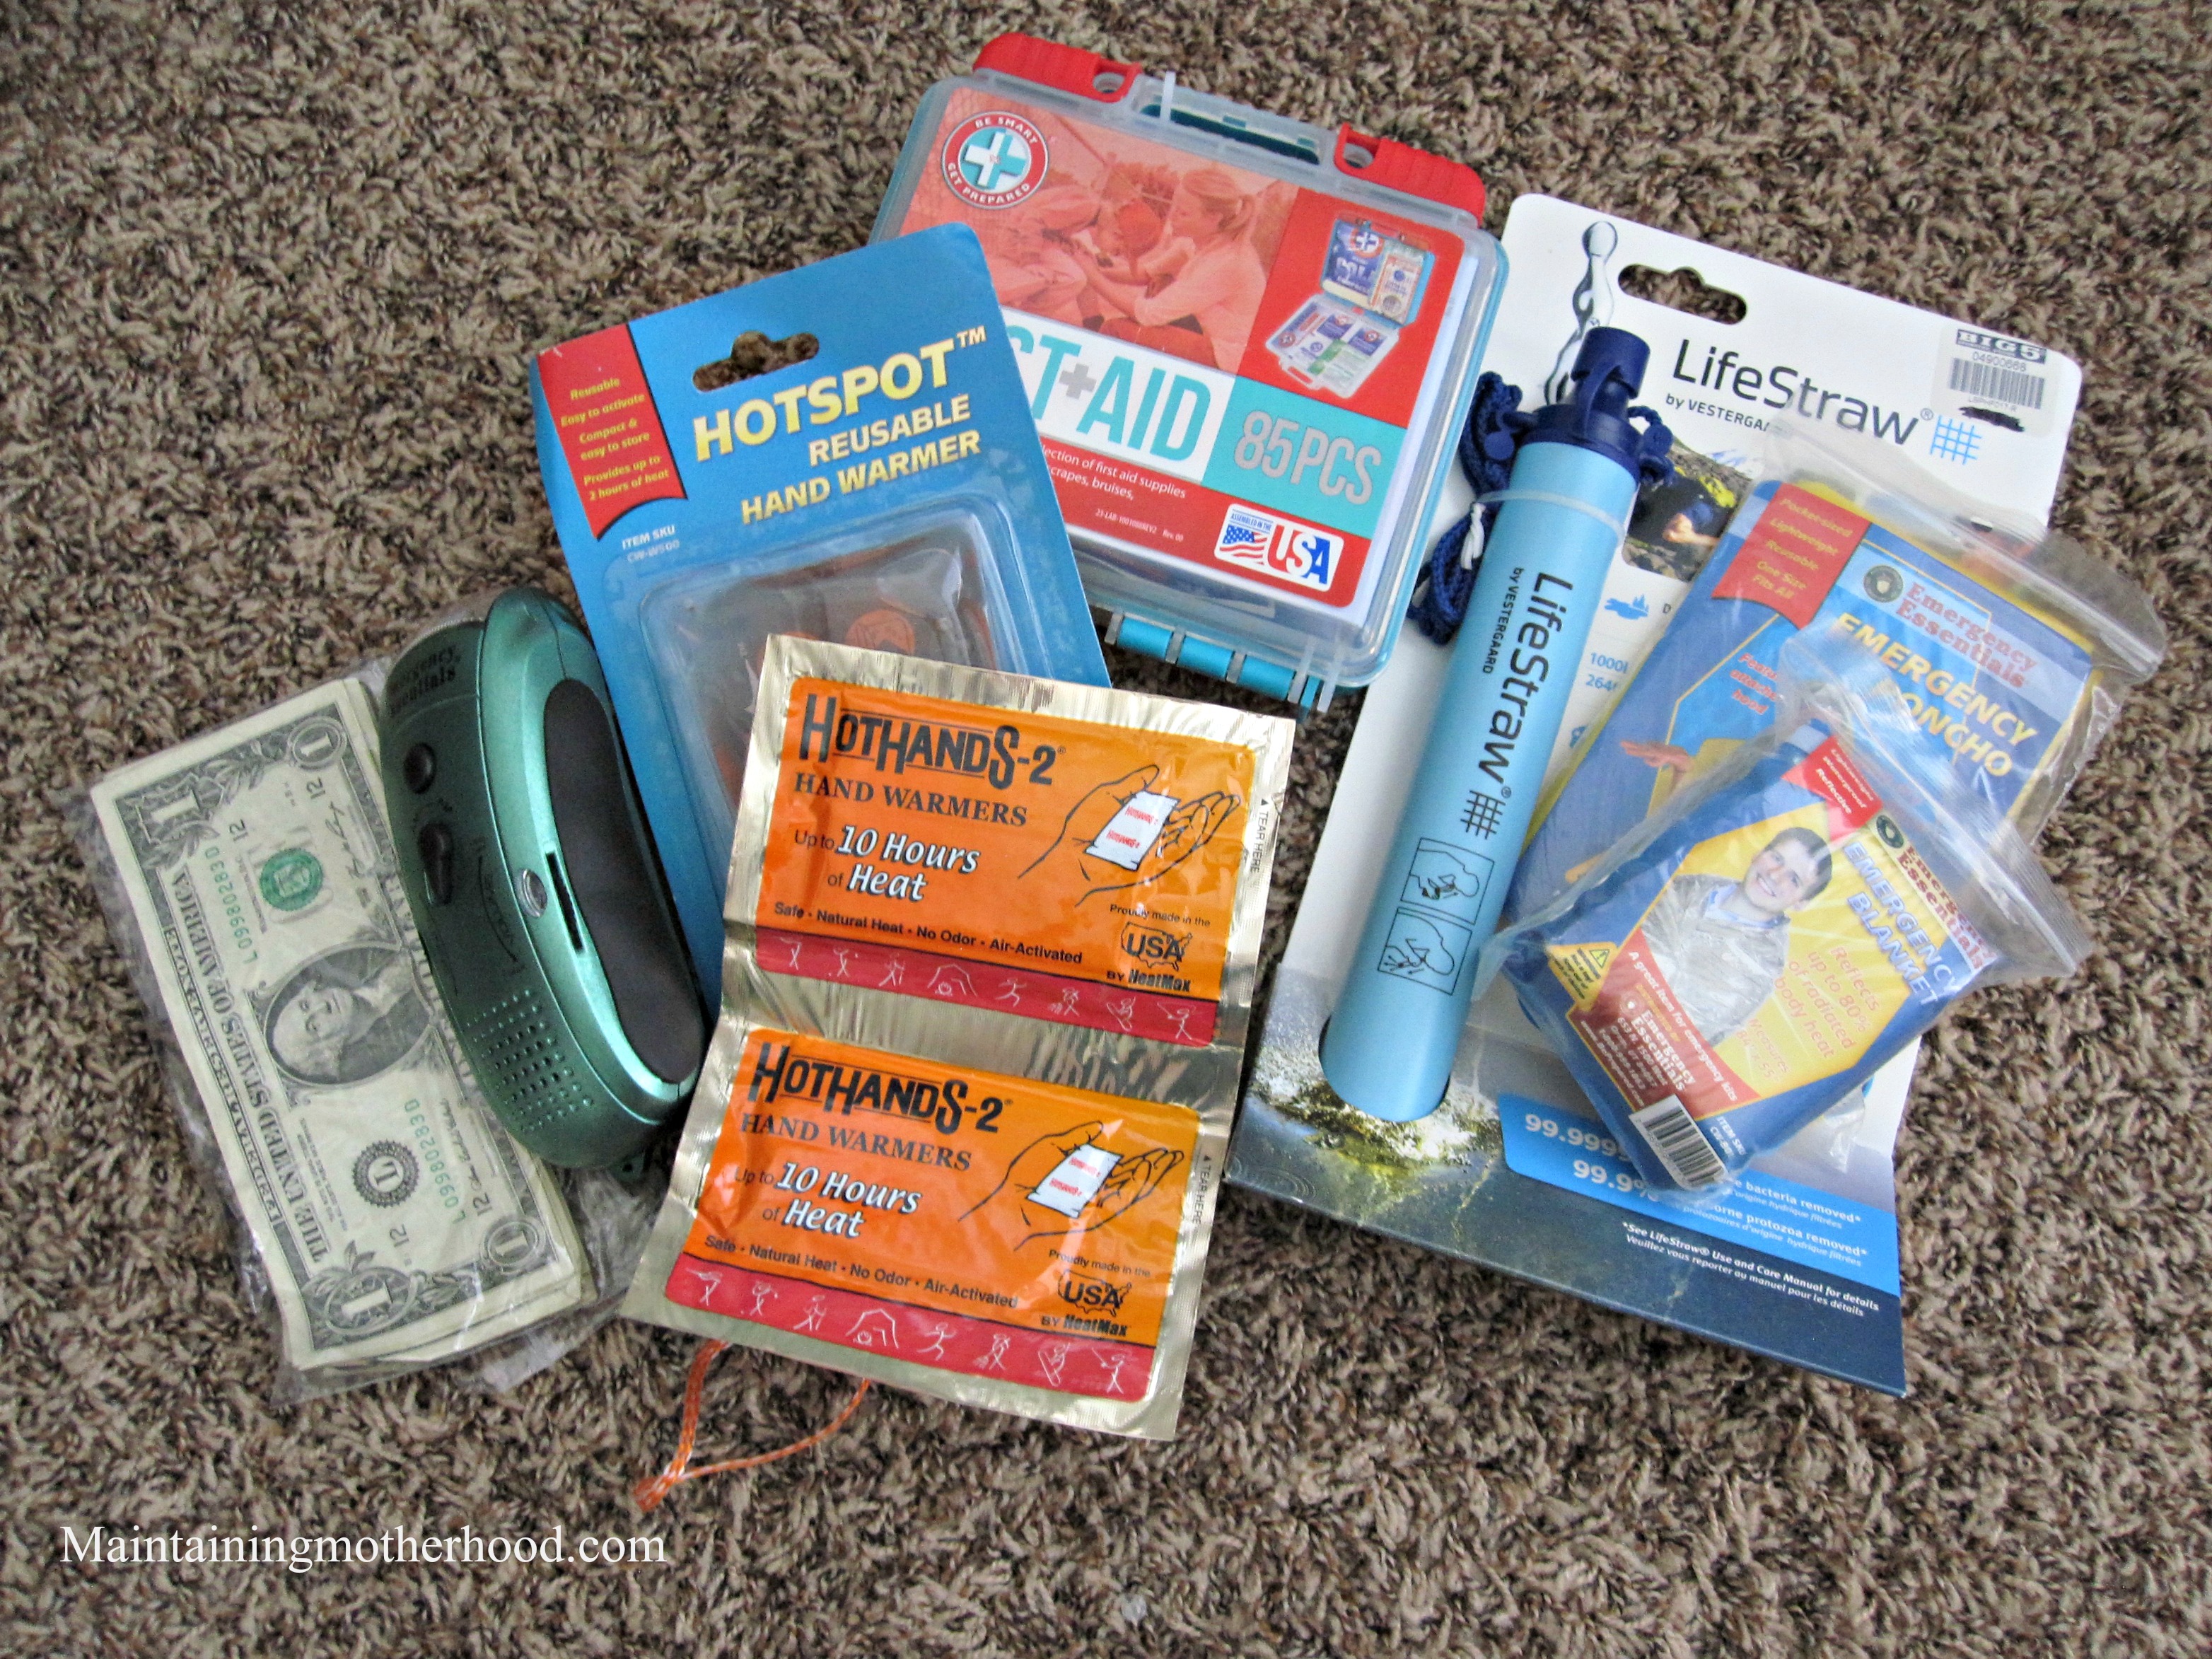
I looked through a ton of different websites (check out my Emergency Preparedness Pinterest Board) and came up with a checklist that worked for my family. I tried my best to include links to exactly what we have in our kits. We included the essentials like:
- Cash in small bills
- Emergency Blanket
- First Aid Kit
- Flashlight with extra batteries
- Hand warmers
- Life Straw personal water filter
- Lighter
- Poncho
- Radio with extra batteries
- Whistle, compass, match holder combo
Hygiene
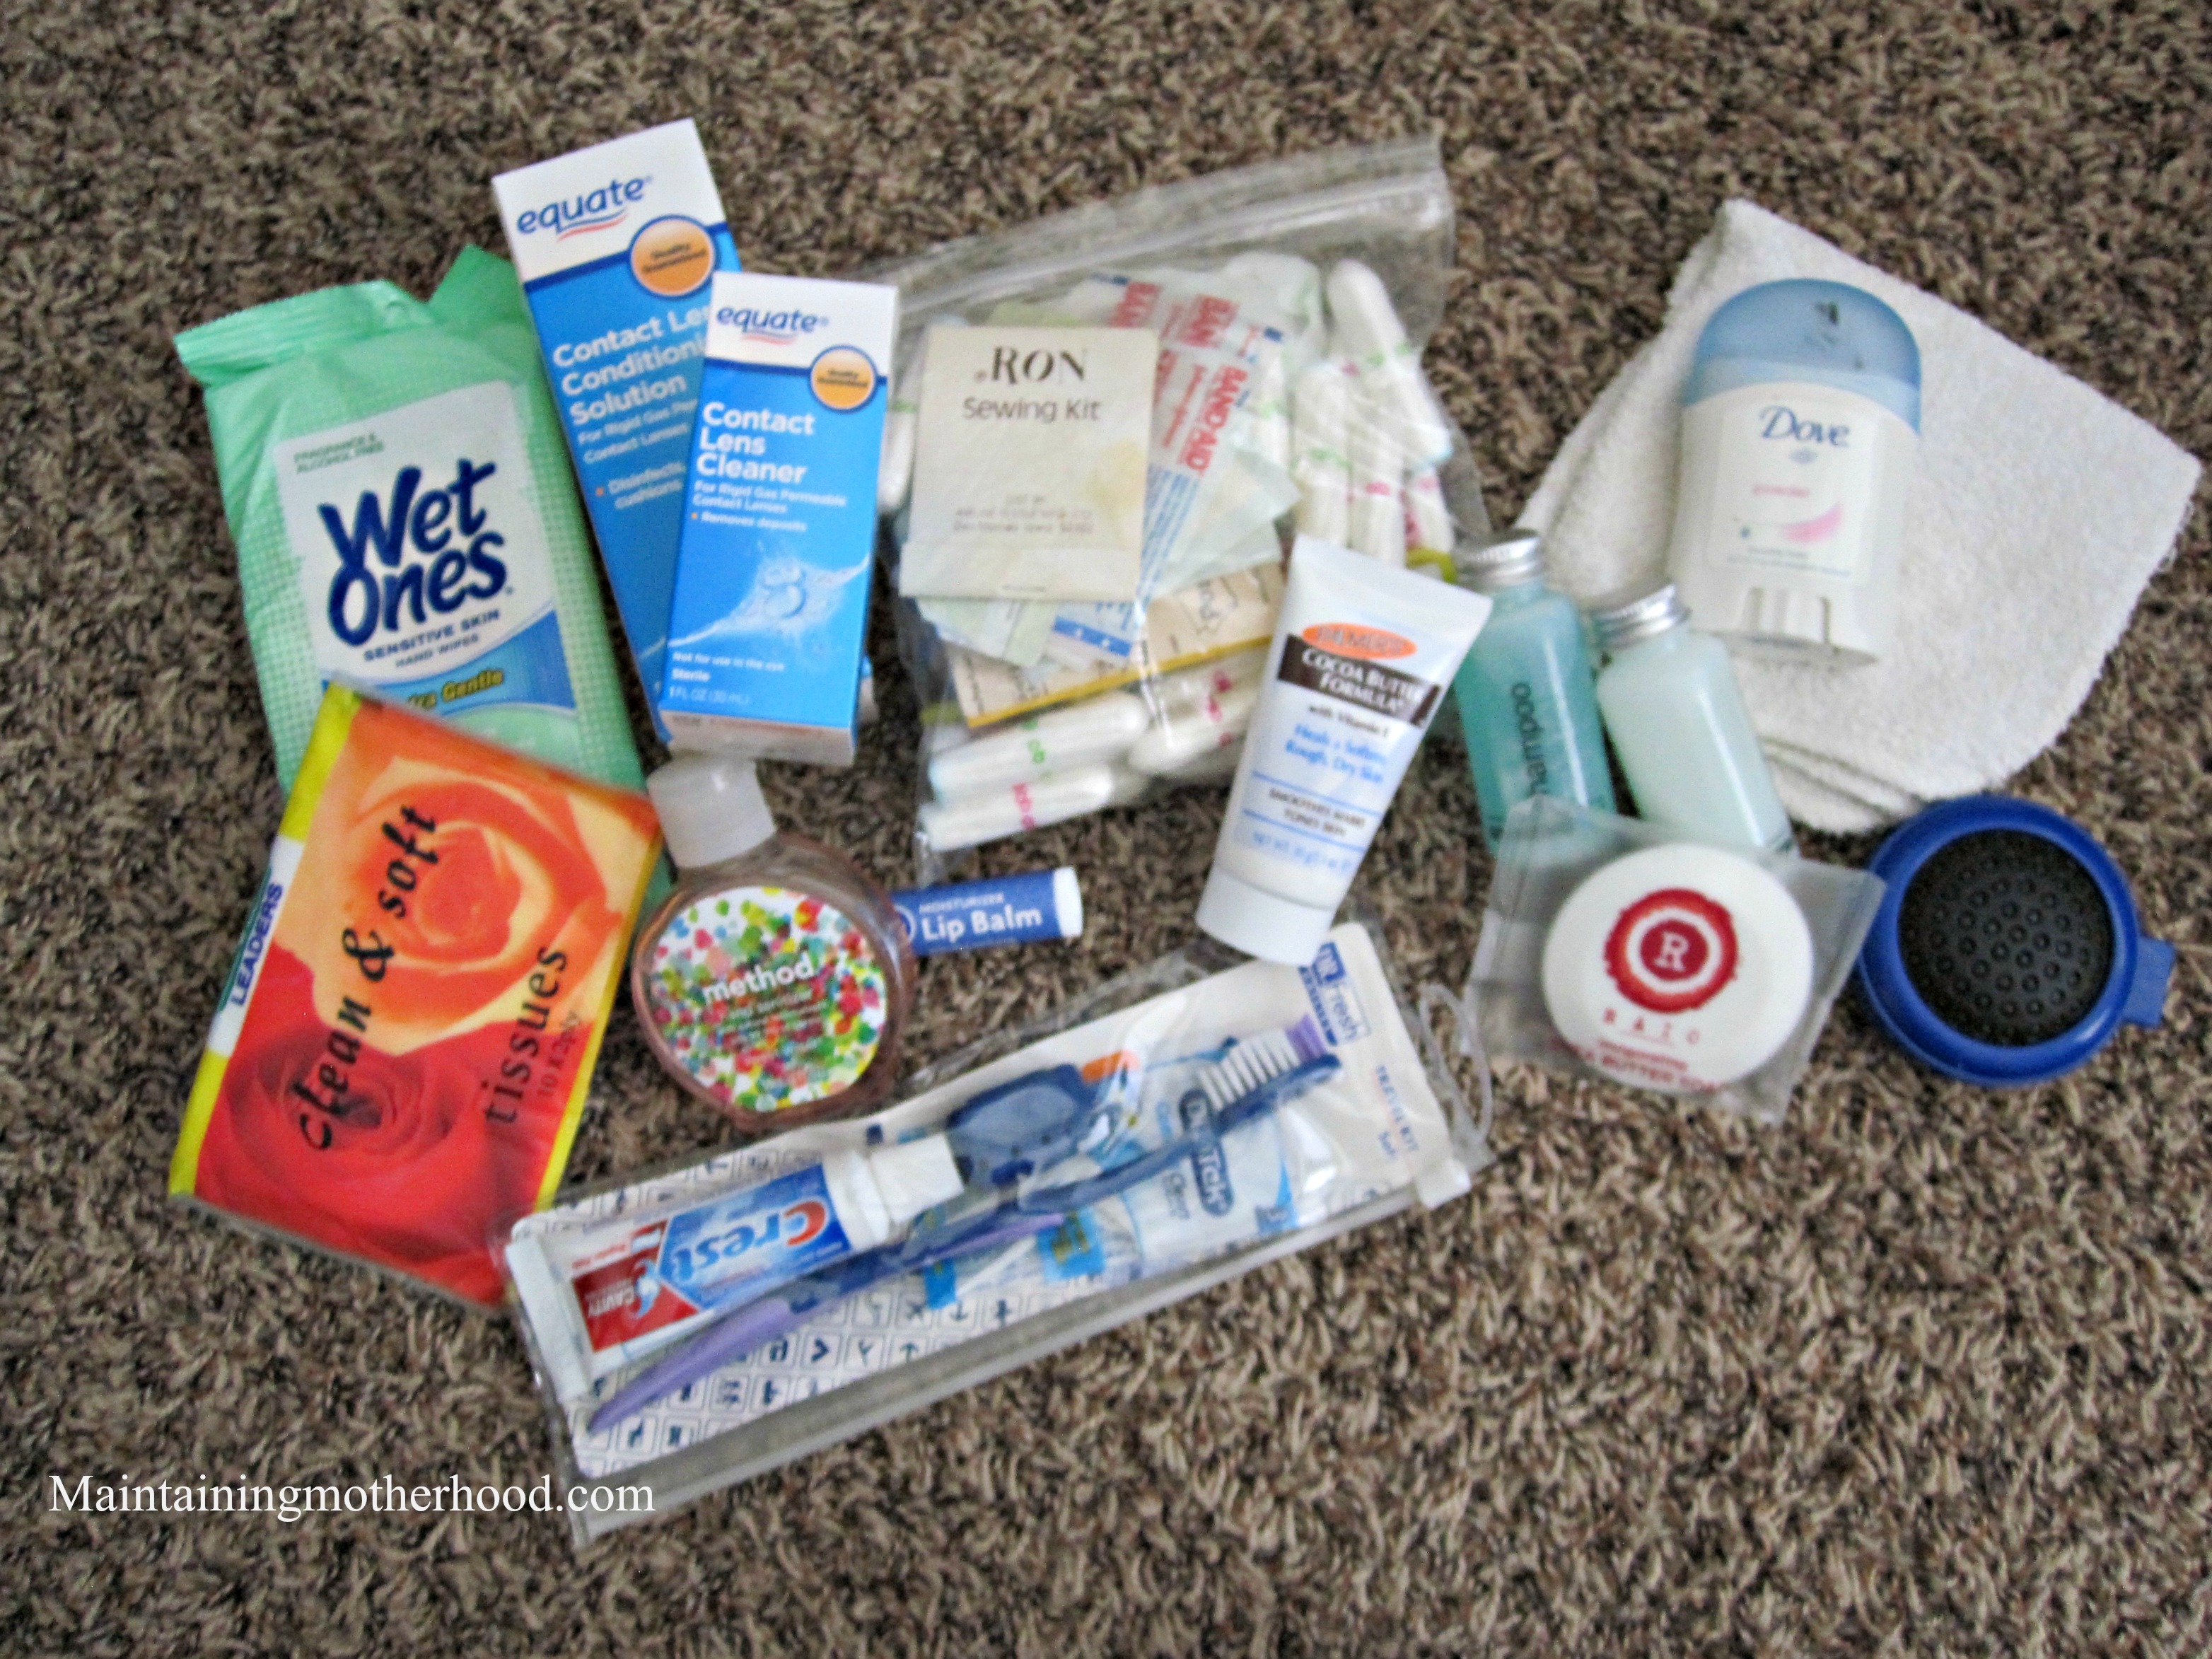
This list seemed pretty basic. Pretty much everything you can find in little travel sizes, which makes it convenient.
- Baby wipes, Chapstick, comb, deodorant, feminine hygiene, hand sanitizer, Kleenex, lotion, razor, shampoo/conditioner, soap, toilet paper, toothbrush/toothpaste, and washcloth. (or you could purchase a kit with most of these things already included for men or for women specifically.)
Clothing
Again, basic.
- Long shirt and pants, 2 socks, 2 underwear
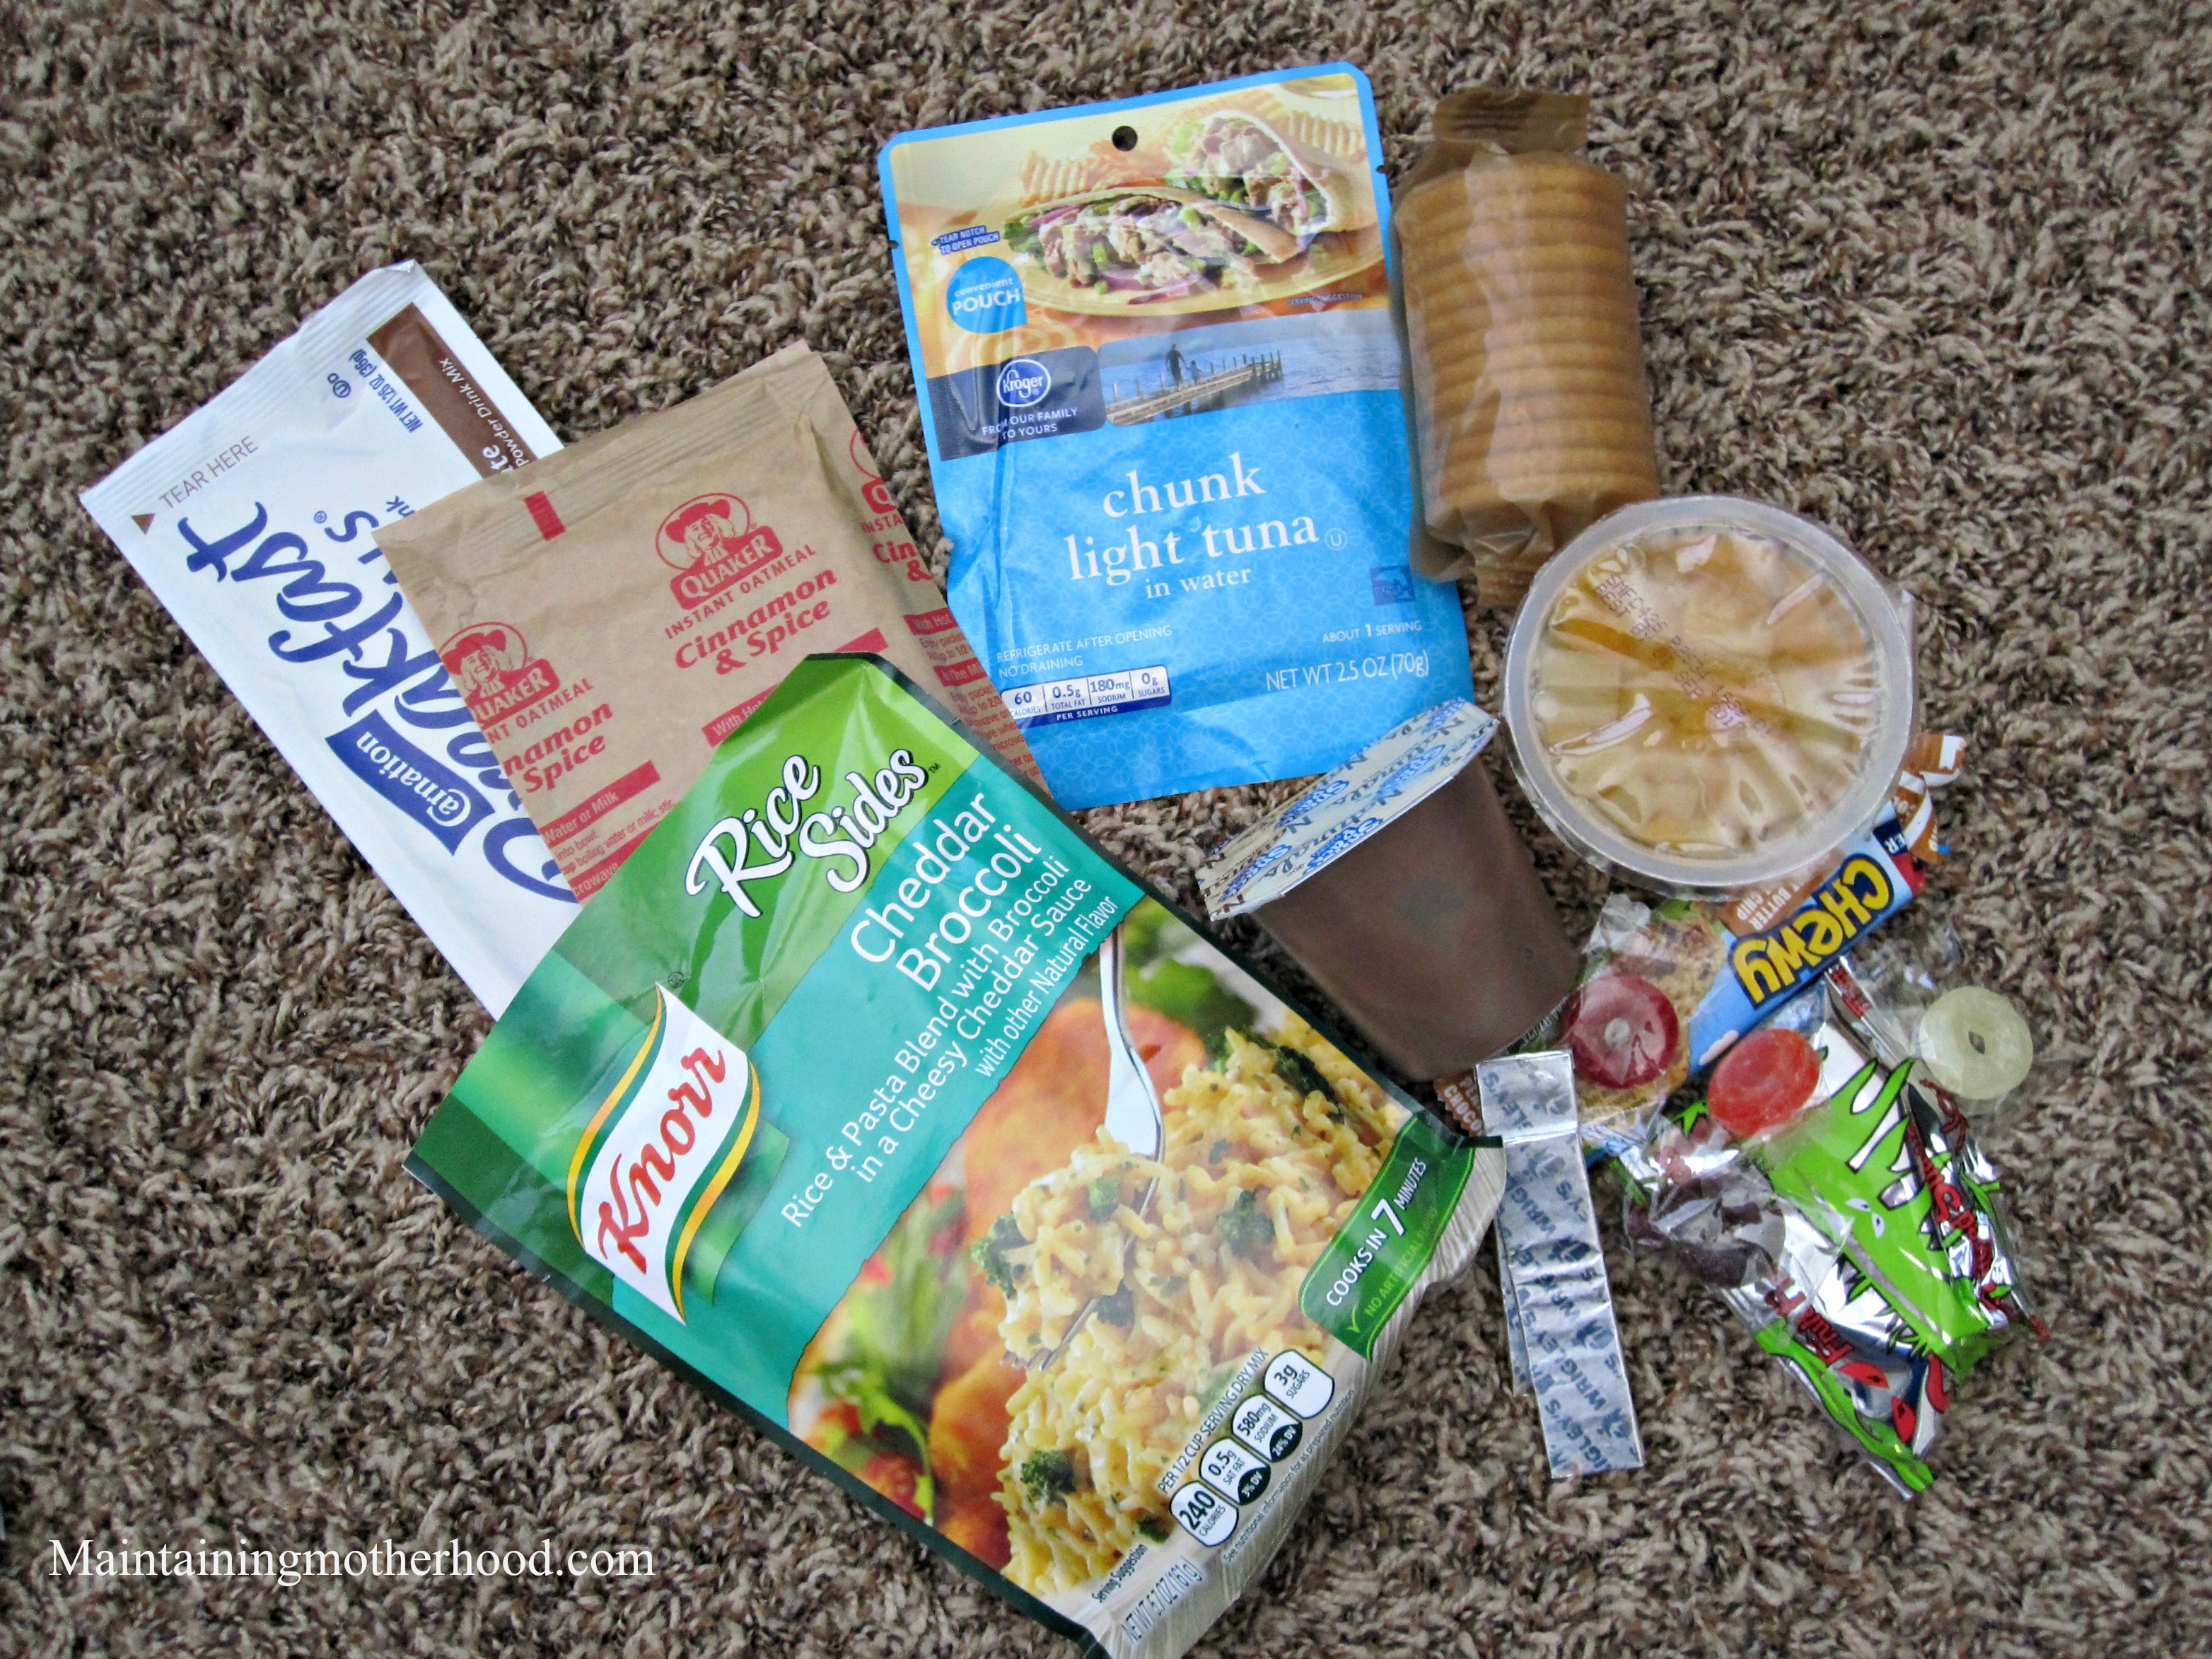
Food
This is the area where the bulk of my time was spent. I wanted food that:
- is light weight
- has a fairly long shelf life
- has enough calories
- we would actually eat.
This last part is still somewhat up in the air. We don’t eat many processed foods, and it is pretty hard to find whole foods that have a long shelf life without packing #10 cans in each person’s backpack. I tried to keep things as healthy as possible. My kids were getting excited over most of the things I was putting in the cart, so that is a good sign. Some of the foods they have never tried before, but the shelf life and calorie count won me over. I plan to rotate these foods out and use them as fun foods in the kids’ lunches during the school year since they are all grab-and-go types of foods. (to find more food ideas, see my other post just on emergency food here.)
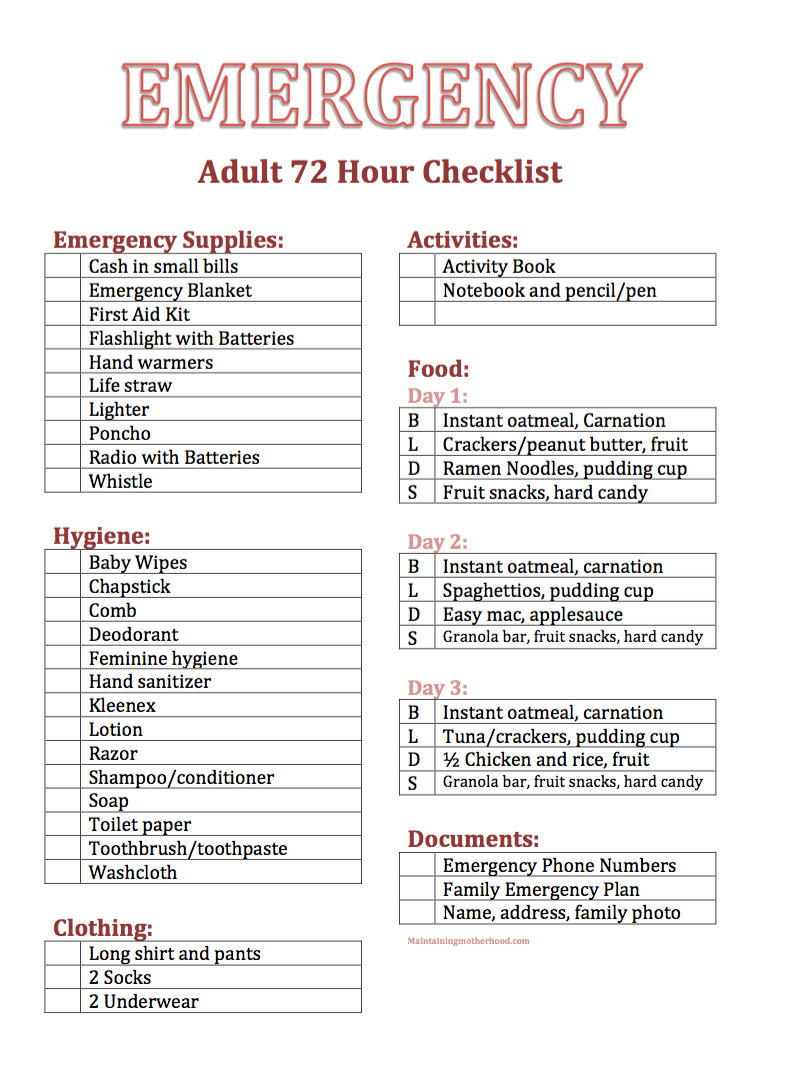
Day 1
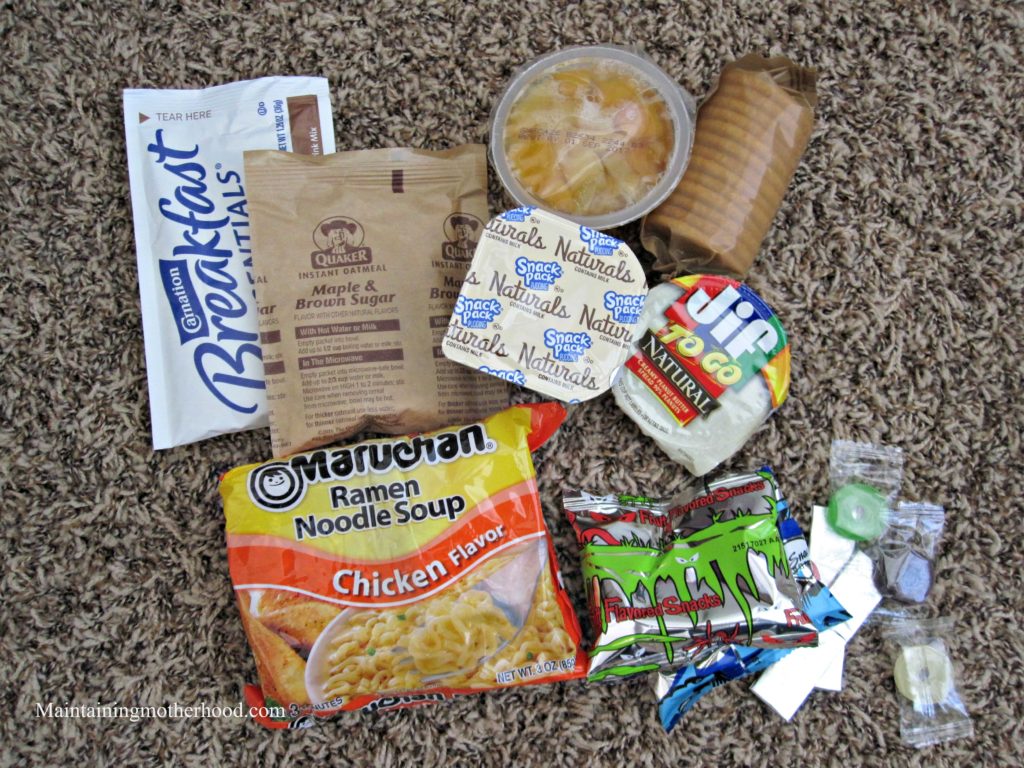
Day 2
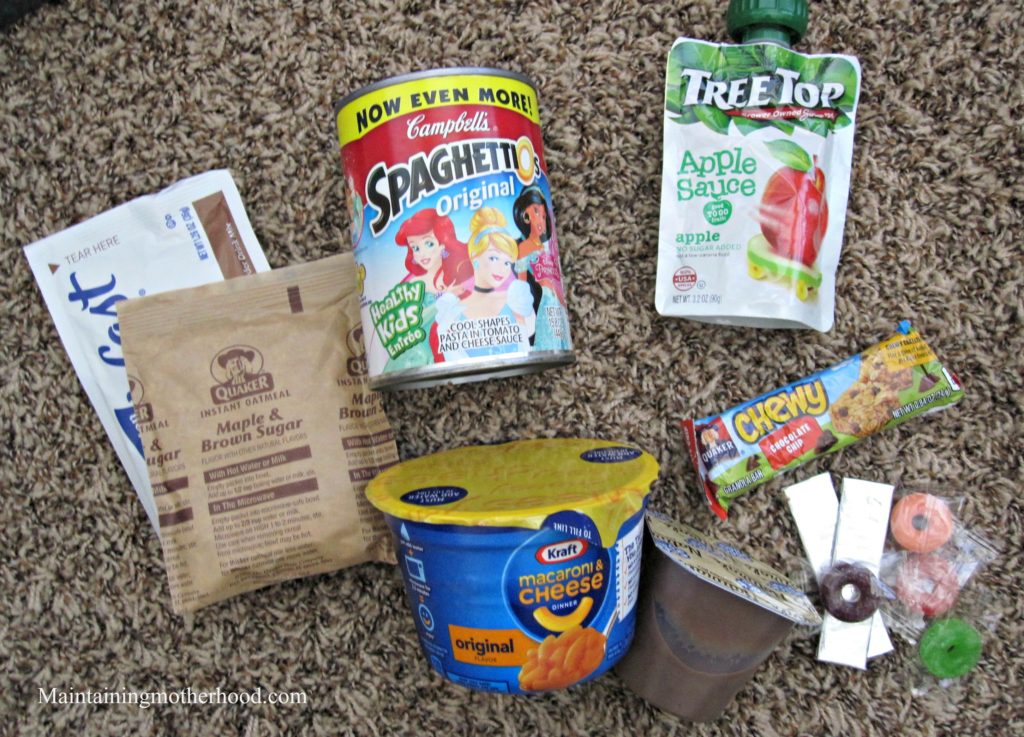
Day 3
I split up the food into bags labeled Day 1, Day 2, Day 3 and included a menu. Super user friendly. For the oatmeal, I included a baggie with regular oats to add to the instant oatmeal. This gives it more substance and calories. I figure you can also then use the bag to soak the oats in overnight. With the food being split up into the different gallon size bags, you can also reuse that bag for making the Ramen noodles and the chicken and rice dinner. Each adult backpack also contains 4 bottles of water.
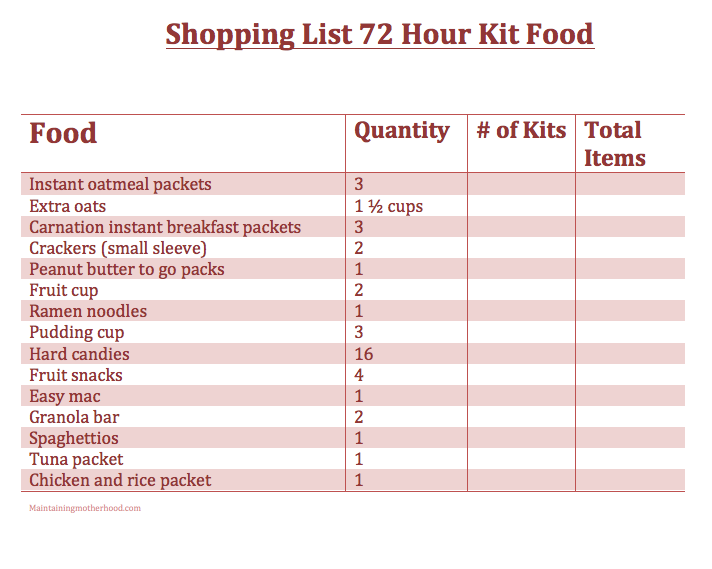
Get the Adult 72 Hour Kit Shopping List here!
Calories
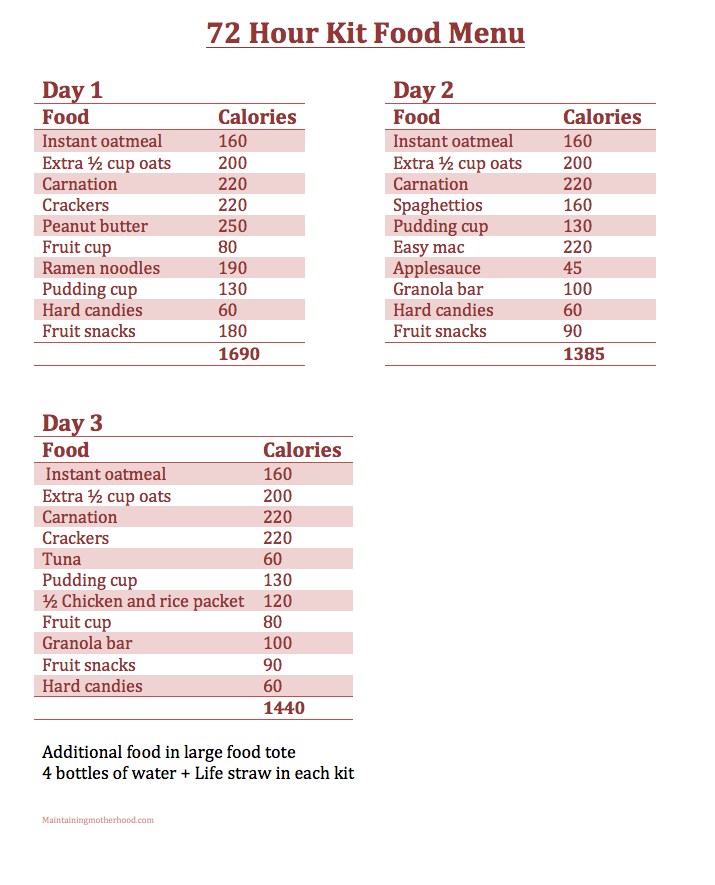
Knowing that my calorie count was higher than just the minimum needed for survival was important to me. The count isn’t super high, but I figure right around 1500 calories is a pretty good amount in a backpack. Remember too, that we have a whole other tote filled with more food. Get your menu with calorie count printable here!
I have another post on just the food aspect of things where I break different food options up by easy to hard in preparation for your kits!
Documents
In addition to our 72 Hour kits, we have a Grab and Go Binder with printouts of Emergency phone numbers, our Family Emergency Plan, a card with our family info, and an up-to-date family photos and all the other important documents we would need.
Whew! That was SO much work! Really, the peace of mind knowing that that I am prepared is very satisfying. Because I made such an effort to keep this simple, I hope to be able to maintain the kits over the years and never have to do a complete overhaul again!
If you are looking for ideas on Kid 72 Hour Kits, or are just wanting a list of food items, here you go!


Great job! But what are you planning to do with the instant breakfast? They need to be added to milk. You might want to add some instant milk packages.
Also, I am seeing things that require cooking and I’m not seeing any means to do that, a pot or pan to cook in, or dishes and silverware. Several of your items also require extra water. I don’t mean to be negative. It is great that you are preparing your family.
Totally not seeing this as negative, thanks for clarifying! Earlier in the post I did state that we have additional totes and emergency water. If we had to leave but were able to take our car, those totes are packed with additional foods and cooking items and are easy to access. Everything in the backpacks can be cooked with just adding water (there is additional water in adult backpacks compared to kid backpacks) although it wouldn’t taste quite as delicious as it would if it were cooked, for sure! I tried to make things as simple as possible in the backpacks knowing that we had other resources that were also ready to go if we had the time and means to carry it.
I do not know if you have pets, just wondered if that was something you had considered adding in future?
I don’t, but that would be a great thing to consider when building your kits!
We have tried them mixed with just water and they taste fine. It will give an extra boost of calories and provide variety to plain water!
Hello. I am someone who just went through Hurricane Florence and was searching for ways to be better prepared. I have a question about the food that needs to be prepared. We didn’t have electricity for three weeks so I am curious as to how you would cook the food. We had food but all was basically food that didn’t truly have on be cooked. Open can and eat more or less. It was our only option. Any suggestions I would appreciate.
Wow, you should totally write about your experience! Much of the food that we have included is the type where you open the can and eat cold, or you can soak it all day in the bag that the food is stored in, like with the rice or ramen. If you do want to cook your food, there are more resources on the 72 Hour Kit Food post with other emergency options. I have linked the fuel cell cookstoves that we have in our kits on that post! http://maintainingmotherhood.com/72-hour-kit-food-list/
Thank you. Your post is by far one of the most comprehensive, easy to read articles on 72 hour prep that I’ve seen. My family and I are in the research process and will preparing our kits within the next couple of weeks. Again. Thank you!
Thank you so much! I’m glad it was so helpful!
I can seem to print off the lists?
I just checked all the printables and they seemed to work just fine on my end. Try again and if it still doesn’t work, I can email them to you if you would like!
I purchased some Hydroheat Flameless Cookware from Emergency Essentials (beprepared.com). You can buy the round containers to cook a meal or the tumbler to heat up water for coffee. They come with a heat pack and when you add water it causes a chemical reaction that heats up the water. I’m sure you can buy them other places but often Emergency Essentials has them on sale. Normally around $30, several times they’ve had them on sale for around $10. They’re small enough to travel with and perfect for quick-cook food or heating up food when you don’t want to drag out a stove and fuel.
Wow! Thank you SO much!
You might want to aide a basic first aid kit. In regards to flash lights head lamps are far easier to use than hand held, a key ring with water cock, basically the key plumbers and landscapers use to turn on handle less water taps, a multi tool, a folding knife, a can opener, and other items can assist you. A good friend with five children from infant to preteen age carries basic essentials in a fanny pack, and each child except her toddler and infant have their everyday go bags they carry. In those bags is a favorite snuggle, water, snacks, headlamps, one set of spare clothes, and emergency card with their picture and in state and out of state emergency contacts, RX medicines, and a copy of immunizations. FEMA has a great planning tool and cards for families.
These are GREAT ideas! Thank you so much for sharing!
Thank you! This has been such a stressful thing to think about but your list made it all come together and seem like less of a never ending list!
I’m so glad it simplified it for you. I spent months of preparing and planning and list writing and reviewing over and over before I finally settled on these lists. Good luck with putting everything together!